

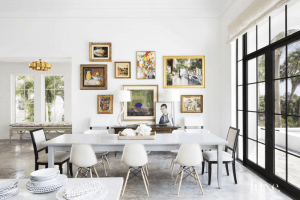
How-To · Color & Paint
Color Drenching 101: A Beginner’s Guide to a Cohesive Space
Color drenching is the technique of painting a room’s walls, trim, ceiling, and sometimes even its furniture in one saturated color family — and it’s the fastest way to make an awkward, boxy, or too-small room feel intentional instead of chopped-up. If you’ve been staring at a choppy floor plan wondering how the rooms on your Pinterest board feel so much bigger and calmer than yours, color drenching is very likely the answer, and it’s far more approachable than it looks.

Color drenching means painting everything in a room the same color family — walls, ceiling, trim, doors, and sometimes furniture — instead of the traditional white-trim-colored-wall split. Removing that boundary is what makes rooms with awkward angles, low ceilings, or a claustrophobic footprint suddenly read as intentional and put-together. It’s not a renovation — it’s paint and planning, which makes it one of the highest-impact, lowest-barrier changes you can make to a small apartment or an oddly-shaped older home.
What’s Inside This Guide
- What Exactly Is Color Drenching?
- Color Drenching vs. Accent Walls vs. All-White
- Why It Works for Small, Awkward & Rental Rooms
- The Room-Size & Light Color Formula
- The Damage-Free Renter Framework
- Step-by-Step: How to Color Drench a Room
- Best Rooms & Styles for Color Drenching
- Color-Drenching Inspiration by Room
- 5 Common Mistakes — Fixed
- Already Painted? How to Fix It
- Decorating Your Color-Drenched Space
- FAQ
I. What Exactly Is Color Drenching?

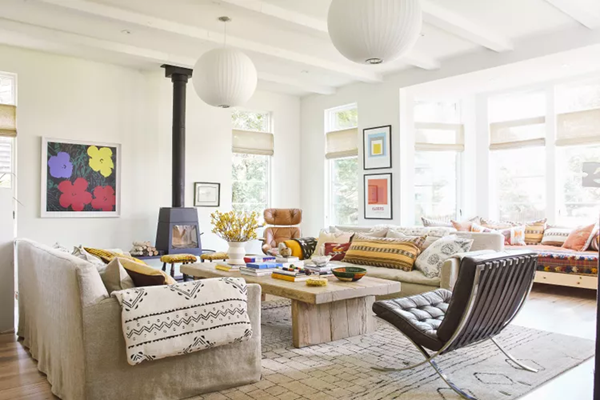
Brynn Olson Design Group
Every stunning, seamless room you’ve screenshotted from Pinterest is very likely using color drenching. The rule is simple: instead of white trim framing a colored wall, every surface — walls, ceiling, trim, doors, sometimes built-ins — gets treated with the same color family.
Here’s what separates it from traditional painting:
- Traditional painting: white trim, colored walls, a hard visual line between them
- Color drenching: that boundary is removed entirely
- Every surface — walls, ceiling, trim — gets the same color family
- The eye stops registering “wall” vs. “trim” vs. “ceiling” as separate zones
A common myth: color drenching doesn’t mean the exact same paint can everywhere. Most professionally color-drenched rooms use a deeper shade on the walls, a slightly lighter tint on the ceiling, and a matching or semi-gloss version on trim and built-ins — all from the same monochromatic family.
The Monochromatic Principle
A monochromatic scheme uses different shades and tints of a single color. Think of it as a recipe with variable amounts of one ingredient rather than a mix of separate ones — you can go lighter or deeper, but you’re never introducing a competing hue. That’s what lets you play with:
- Light versions of your chosen color
- Medium tones for balance
- Deeper shades for drama
- Different finishes — matte, eggshell, or semi-gloss — for texture without changing the color
II. Color Drenching vs. Accent Wall vs. All-White
This is the comparison none of the major color-drenching guides make — and it’s usually the actual decision a first-timer is stuck on.
| Approach | Best For | Effect on Small Rooms | Commitment Level |
|---|---|---|---|
| Color Drenching | Awkward layouts, low ceilings, choppy floor plans | Removes visual breaks; corners disappear | Full room, all surfaces |
| Accent Wall | Rooms that already feel balanced and just need a focal point | Can visually shrink a small room by adding a new stop-point | Single wall only |
| All-White | Rooms with strong natural light and clean architecture | Brightens but doesn’t disguise awkward angles or low ceilings | Full room, low risk |
III. Why Color Drenching Works for Small, Awkward & Rental Rooms

What happens in a small or oddly-shaped room when you color drench it:
- Corners visually disappear instead of drawing attention to the room’s boundaries
- The ceiling line reads as continuous instead of capping the space
- Doorways and trim blend rather than fragmenting the wall into segments
- Architectural quirks — a bumped-out closet, a low soffit, an angled wall — recede instead of standing out
Practical and psychological upside beyond the visual trick:
- Simpler paint buying — one color family instead of coordinating several
- Less leftover paint waste and fewer decisions to second-guess
- Easy touch-ups later since everything matches
- A calmer, less visually cluttered environment, which several designers connect to easier focus in home offices and bedrooms
IV. The Room-Size & Light Color Formula
| Room Condition | Formula | Why |
|---|---|---|
| North-facing | Choose warmer undertones | Cool northern light can make a cool-toned color read flat or gray |
| South-facing | Most colors work | Strong, warm light balances most undertones throughout the day |
| East-facing | Mid-tones perform best | Morning light is cool and direct; midday shifts neutral |
| West-facing | Colors read warmest in the evening | Late light intensifies warm undertones — test in evening hours |
| Small room, low ceiling | Light-to-mid tone, satin or eggshell | Lifts the space without losing the cocooning effect |
| Larger room, high ceiling | Deeper, saturated tone | Prevents the room from feeling cold or under-scaled |
Test Large, Not Small
Paint sample squares at least 2×2 feet — small chips and 4″x4″ swatches don’t hold enough of the color’s undertone to judge accurately in a fully drenched room.
Check It at Three Times of Day
Morning, midday, and evening light change a color’s undertone dramatically. A shade that looks perfect at noon can read muddy or cold by 8 p.m.
Live With It a Week
Colors settle differently once your eye adjusts. A week is the minimum designers recommend before committing to a full room.
Photograph It
Camera white balance shifts color in ways your eye compensates for automatically. If you plan to photograph the room later, check how the sample reads in photos now.
The LRV Shortcut (Skip the Guesswork)
Every paint chip lists an LRV — Light Reflectance Value — usually printed on the back or listed on the brand’s website. It’s a 0–100 scale measuring how much light a color bounces back, and it’s the fastest way to shortcut the sampling process:
- LRV 10–40: moody, cocooning rooms — bedrooms, dining rooms, studies
- LRV 45–60: bright but still saturated — living rooms, home offices, kitchens
- LRV 60+: closer to a soft neutral than a true drenched color — better for hallways or rooms with limited natural light that still need some brightness
Once you know your target LRV range, you can filter paint options before you ever buy a sample can — then confirm the specific undertone with the large-swatch test above.
Popular Color Choices Right Now
- Sage green — calming, natural, forgiving in most light
- Warm taupe — minimalist-friendly, reads as neutral from most angles
- Dusty blue — sophisticated without going cold
- Soft terracotta — warmth and character in north-facing rooms
- Deep jewel tones (navy, forest, ruby) — dramatic in larger or well-lit rooms
Behr’s 2026 Color of the Year, a smoky jade called Hidden Gem, and Farrow & Ball’s ultra-matte Dead Flat finish are both frequently cited examples of paint lines built specifically to support this technique — Dead Flat in particular is designed to intensify dark, drenched colors without a flat, chalky look.
V. The Damage-Free Renter Framework
This is the gap every competing guide skips: most people searching “color drenching” for a first apartment or a rental aren’t asking “what is it,” they’re asking “can I actually do this without losing my deposit.” Here’s the honest framework.
If Painting Isn’t Allowed
- Removable wallpaper in a solid, saturated tone on walls (and ceiling, if your lease allows)
- Large fabric panels stapled to a removable frame or tension rod as a color backdrop
- Furniture and accessories — bedding, curtains, rugs — all pulled from one color family
- Temporary, peel-off trim covers in a matching tone
If Painting Is Allowed
- Get the color-drenching plan (including ceiling and trim) approved in writing before buying paint
- Ask whether you’re required to repaint white before move-out, and price that into your budget
- Use the same paint batch number throughout for color consistency across walls, ceiling, and trim
- Photograph the original wall color before you start, for your move-out documentation
VI. Step-by-Step: How to Color Drench a Room

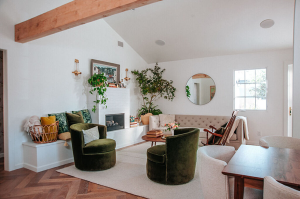
Heather Talbert / Jenami Designs
What You’ll Need
- Paint (1 gallon covers about 400 square feet)
- Quality rollers and brushes — cheap brushes leave visible lap lines on trim
- Painter’s tape, drop cloths, paint trays
- Step ladder and extension pole for ceilings
- Spackling paste, sandpaper, and a tack cloth for repairs
Clear and Clean the Room
Move furniture to the center, remove outlet covers and switch plates, take down curtains and art. Wipe every surface down and let it dry fully — paint doesn’t bond well over dust or cobwebs, especially in corners.
Repair and Smooth
Fill nail holes with spackling, sand rough patches, and wipe away dust with a tack cloth before any paint goes on.
Paint the Ceiling First
Cut in the edges, then work in small sections, keeping a wet edge throughout to avoid visible seams.
Move to the Walls
Start in the corners, roll in W-patterns for even coverage, and work top to bottom.
Finish With Trim
Pull painter’s tape while the paint is still slightly wet, and use steady, even strokes on window and door frames.
What It Actually Costs
Budget is one of the biggest unspoken hesitations with color drenching — here’s a realistic range based on standard mid-range interior paint pricing and the wall, ceiling, and trim coverage of two common room sizes. Prices will vary by brand and finish, so treat this as a planning range rather than a quote.
| Room Size | Approx. Paint Needed | Estimated Paint Cost | Notes |
|---|---|---|---|
| Small (10′ x 10′, 8′ ceiling) | 2–3 gallons total (walls, ceiling, trim) | $120–$250 | One brand, one color family, multiple finishes |
| Medium (12′ x 14′, 9′ ceiling) | 3–4 gallons total | $180–$340 | Add ~15–20% if walls need a stain-blocking primer coat first |
| Large (15′ x 18′, 9’+ ceiling) | 5–6 gallons total | $300–$520 | Budget extra for a second coat on deep, saturated colors |
Renters should add the cost of one extra can of neutral or white paint to this budget if the lease requires repainting to the original color before move-out.
VII. Best Rooms & Styles for Color Drenching

Small Spaces
Powder rooms, home offices, reading nooks, hallways, and guest bedrooms are ideal — they’re contained enough that a bold, fully-drenched color reads as intentional drama rather than overwhelming a home’s flow.
Statement Rooms
Dining rooms, libraries, primary bedrooms, and studies can carry a deeper, more dramatic palette since they’re typically closed off and used with intention.
Which Styles It Suits
| Style | How Color Drenching Enhances It |
|---|---|
| Modern & Contemporary | Clean lines and sleek furniture let the monochromatic scheme read as architectural rather than decorative |
| Traditional & Classic | Molding and period detail become the texture, since the color is already unified |
| Transitional | Mixed furniture styles feel curated instead of mismatched under one consistent color |
Free Patio Style Quiz
Once your indoor rooms are drenched and cohesive, take the styling outside. Answer a few quick questions and get a personalized patio furniture style match.
Take the Free Quiz →VIII. Color-Drenching Inspiration by Room
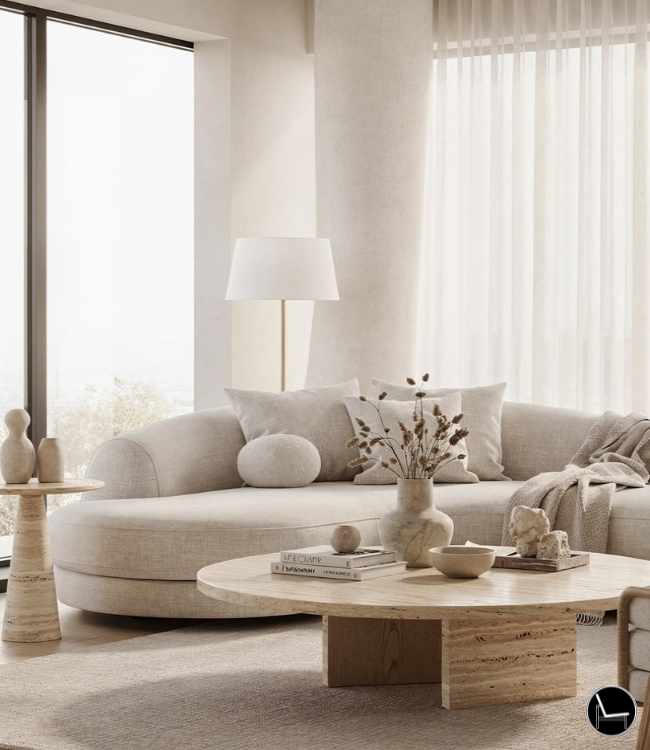
Living Room

Deep sage green: walls, trim, ceiling, and built-ins in the same shade, layered with velvet pillows in a lighter sage, chunky knit throws in forest green, a natural jute rug, and brass light fixtures for warmth.
Bedroom

Soft blue-gray: matte walls, a slightly lighter ceiling shade, high-gloss trim, and bedding layered from linen duvet to wool blanket, all within the same color family. A plush wool carpet and warm wood nightstands keep it from feeling cold.
Guest Room

Deep navy: all walls, a slightly lighter ceiling, glossy trim for contrast, and navy-painted furniture — balanced with silver light fixtures, white linens, and chrome hardware so the room doesn’t feel closed-in.
Home Office

Forest green: walls and built-ins in forest green, a lighter ceiling shade, and semi-gloss trim, styled with a leather desk chair, brass desk lamp, and matching storage boxes for an office that feels focused rather than sterile.
IX. 5 Common Color-Drenching Mistakes — Fixed
X. Already Painted It and Not Loving It? Here’s the Fix
| What It Feels Like | Likely Cause | Fix Before You Repaint |
|---|---|---|
| Too dark or cave-like | Cool-temperature lighting or a single flat sheen everywhere | Switch bulbs to warm 2700K–3000K and add a semi-gloss finish to trim to bounce more light |
| Flat or unfinished, despite the “right” color | No texture variation | Layer in at least three textures — see Section XI — before assuming the color is wrong |
| Looks patchy or uneven | Mixed paint batches or inconsistent wet-edge technique | Repaint with a single batch number, working in smaller sections to maintain a wet edge |
| Feels smaller, not bigger | Trim painted in a contrasting color rather than the same family | Repaint just the trim to match — this alone often resolves the issue without touching the walls |
XI. Decorating Your Color-Drenched Space

Textures
Textures are the seasoning that keeps a monochromatic room from feeling flat.
- Soft: velvet pillows, chunky knit throws, plush area rugs, woven window treatments
- Hard: ceramic vases, glass accessories, metal frames, wood furniture, stone objects
Patterns Without Breaking the Flow
- Choose patterns within the same color family
- Mix scales — large, medium, small
- Cap patterns at roughly 20% of the room’s textiles
Furniture & Metallics
Choose furniture in similar tones, mix in natural materials, and add one or two statement pieces for contrast. Metallic touches on light fixtures, hardware, mirror frames, and lamp bases add sparkle without introducing a competing color.
Most Popular on the Decorholic
Your Color-Drenched Journey Starts With One Room
Color drenching isn’t about talent — it’s a formula: pick a color that matches your room’s light and size, prep properly, paint ceiling-walls-trim in that order, and layer texture instead of competing colors on top. Start with something small and contained, like a powder room or a home office, before tackling a larger statement room.
Key Takeaways:
- Choose your color using light direction and room size, not just what looks good on Pinterest
- Test large samples across a full day before committing
- Vary the sheen by surface for depth without a second color
- Renters: get written approval and budget for repainting before move-out
- Layer at least three textures once the paint is finished
Happy color drenching!
Frequently Asked Questions About Color Drenching
Will color drenching make my small room feel smaller?
No — it typically has the opposite effect. Color drenching removes the visual breaks (trim lines, corner shadows, ceiling boundaries) that make a small room feel chopped up, so the eye moves through the space instead of stopping at every edge.
Do I have to use the exact same paint color on every surface?
No. Most color-drenched rooms use slightly different shades from the same family — a deeper wall color, a lighter ceiling tint, and a matching or semi-gloss trim — rather than one identical can everywhere.
What colors work best for color drenching?
Neutrals and muted, gray- or greige-undertoned colors tend to be the easiest to live with long term. Popular current choices include sage green, warm taupe, dusty blue, and soft terracotta, though deep jewel tones work well in larger or well-lit rooms.
Can I color drench a rental without losing my deposit?
Always get written landlord approval first. If painting isn’t allowed, removable wallpaper, large fabric panels, and furniture and accessories from the same color family can approximate the effect without any wall damage.
How do I choose the right paint finish for each surface?
A common approach is matte or eggshell for walls, semi-gloss for trim and doors, flat for the ceiling, and a higher-gloss finish in higher-traffic or higher-humidity areas that need extra durability.
How much paint do I need for color drenching a room?
Budget about one gallon per 400 square feet of wall space, plus roughly 20% extra for ceiling coverage and additional paint for trim and doors. Buy from the same batch number for color consistency.
Is color drenching just a passing trend?
While it’s trending in search interest right now, the underlying technique — monochromatic, full-surface color application — has been used in historic interiors for centuries. Chosen in a timeless, gray-undertoned color, it tends to age well rather than dating quickly.
What’s the difference between color drenching and an accent wall?
An accent wall isolates color to a single surface for contrast; color drenching applies one color family across every surface for cohesion. Small or awkward rooms generally respond better to color drenching, since an accent wall can add a new visual stop-point rather than removing one.
Does color drenching work with natural light challenges, like a north-facing room?
Yes, but the color choice matters more. North-facing rooms read best in warmer undertones, since cool northern light can make a cool-toned color look flat or gray once it’s on every surface.
Which rooms should I avoid color drenching?
Open-concept spaces without clear boundaries are the hardest to drench successfully, since there’s no natural stopping point for the color and it can bleed visually into adjoining areas. Designers generally recommend starting with a room that can be closed off, like a guest room, office, or powder room.
Can I color drench with wallpaper instead of paint?
Yes — a solid, saturated wallpaper on walls (and ceiling, where allowed) achieves a similar enveloping effect and is a strong renter-friendly alternative to paint, especially with a removable, peel-and-stick option.
Should the closet inside a color-drenched room match too?
For the most seamless effect, yes — carrying the color into a closet interior removes yet another visual break. It’s optional, though, and a neutral closet interior won’t undo the effect in the main room.
CATCH THE LATEST IN HOME DECOR TRENDS:
Steal These 16 Expert-Approved Decorating Secrets

How To Accessorize Your Living Room
How to Make a Small Room Appear Bigger
How to Make Your Home Look Expensive
GET CAUGHT UP ON ALL THE INSPIRING DECOR TIPS:
18 Fresh Decorating Ideas To Update Your Fireplace
How to Make a Gallery Wall: The Complete Step-by-Step Guide (Even If You’ve Never Hung a Picture)
