TL;DR Summary: Effective wall color placement isn’t just about choosing a shade you love — it’s about knowing which wall gets that color and why. This guide walks you through color psychology, room-by-room placement rules, the 60-30-10 formula, and the most common mistakes that make otherwise beautiful colors fall flat.
Intro To Best Wall Color Placement Strategies
Most people pick a paint color, slap it on the first wall they see, and wonder why the room feels off. The paint isn’t the problem. The placement is. Wall color placement — deciding which wall gets which color, and why — is the single most underestimated skill in home design.

Get it right, and the room feels intentional. Get it wrong, and even a stunning color turns the space into a visual mess.
This guide will show you exactly how to think about wall color placement: room by room, wall by wall, with clear decision rules you can use today.
I. What is wall color placement — and why does it matter?
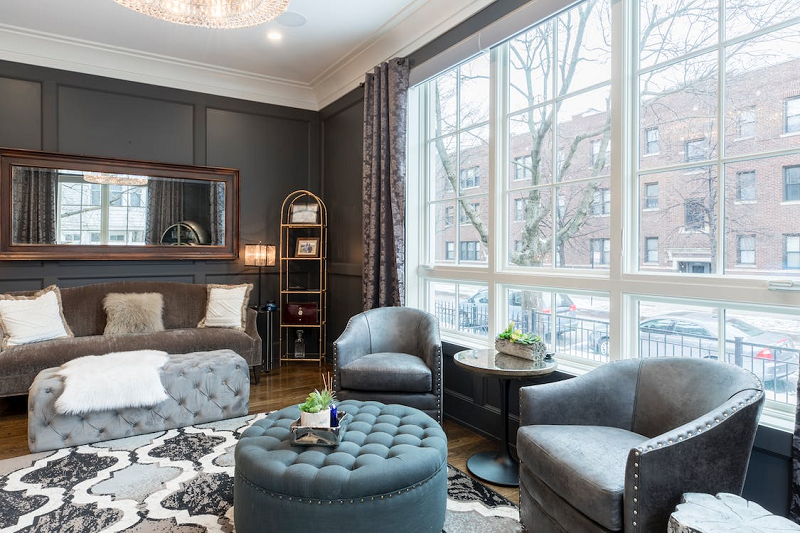
Wall color placement refers to the strategic decision of which wall in a room receives a distinct paint color, and how that choice interacts with the room’s architecture, lighting, furniture, and purpose. It’s not enough to pick a beautiful color. That color must land on the right surface to achieve the intended effect. A rich navy that reads as sophisticated on a bedroom’s headboard wall can feel oppressive if applied to a narrow side wall beside a window.
The impact is measurable. According to Benjamin Moore’s color experts, cooler colors tend to recede and create the illusion of more space, while warmer colors make a room feel cozier and more intimate. That optical effect is driven entirely by placement — not just by the color itself.
“Your eye will be drawn there once you walk into the room, so be sure to choose somewhere you want people to focus on.” — Benjamin Moore Color Experts
Pro tip: Before you open a paint can, stand in the doorway of the room and note where your eyes land first. That wall — or the surface closest to it — is almost always the right candidate for your accent color.
Dive deeper with this step-by-step guide on: How to Decorate Above a Couch: The Designer’s Step-by-Step Guide
II. How do I choose which wall to paint a different color?
The most important rule in wall color placement is to follow the architecture. Your room is already telling you where the focal point is — you just need to listen. The best accent walls tend to sit behind a focal point like a bed, fireplace, or media console, or face the entrance so it’s the first thing guests see when they walk in. Walls that feature architectural details — alcoves, wainscoting, built-in shelving — are also strong candidates.
What to avoid: walls with multiple doors or windows, which can disrupt the visual impact of the color. Fragmented surfaces break the color story before it begins.
- Identify the room’s natural focal point — the fireplace, the bed wall, the built-ins, or the wall directly facing the entry.
- Check for interruptions — count the doors and windows on your candidate wall. More than one or two and you’ll lose cohesion.
- Note the light source — walls that receive more direct sunlight make colors appear brighter and vibrant, while walls with less direct sunlight may require lighter shades to avoid looking too shadowed or dull.
Pro tip: Aim to end any color change at an interior corner — not an exterior one. Ending at an interior corner avoids the pressure of getting an ultra-even line where the two colors meet, which even professionals find difficult to execute cleanly.
Keep reading for a designer-approved guide to: How to Decorate Your Living Room With Simple Things: The Step-by-Step Guide to a Beautiful Space Under $150
III. How to pick the right color for wall color placement
Once you know which wall, the color choice becomes much more focused. Two proven frameworks help eliminate guesswork: the 60-30-10 rule, and the contrast-matching method.
A. The 60-30-10 rule for wall color placement
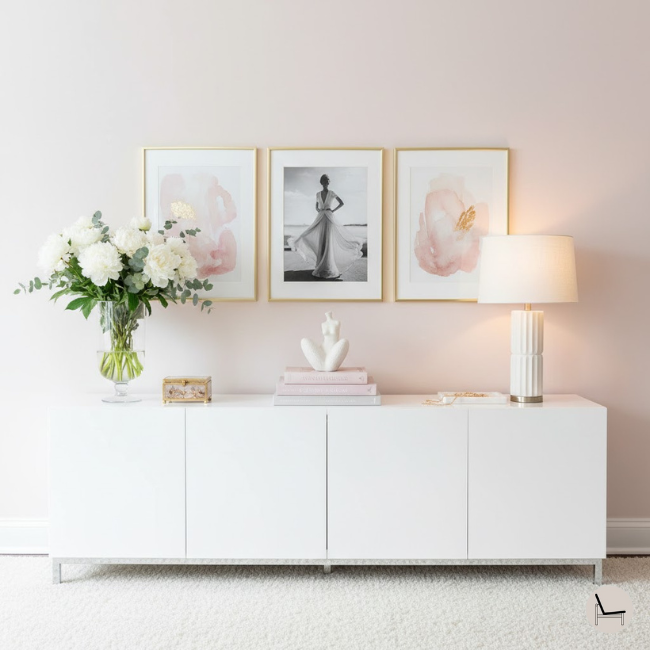
This is the most reliable color balance formula in interior design. 60% of the room should carry the primary color (main walls and large furniture), 30% should carry the secondary color (rugs, curtains), and 10% should carry the accent color (smaller furniture, throw pillows, decor, and artwork). Your accent wall falls in that 10% category — which is exactly why one wall is almost always enough.
- Scan your room’s existing decor to identify the accent color already present in pillows, art, or accessories.
- Use that existing accent as the starting point for your wall color — it creates instant cohesion.
- If your room has no existing accent color, choose the wall color first and then build accessories around it.
Pro tip: If you really want to accent a color from a piece of artwork or textile, choose your accent wall color first — then select your remaining wall colors to work around it. This prevents the common mistake of picking a wall color in isolation.
B. Contrast-matching method
The second framework is simpler but just as powerful. Benjamin Moore’s color experts recommend choosing a color a few shades lighter or darker than the existing walls to create optimal contrast. For rooms with midtone or deeper walls, try a lighter accent. For rooms with lighter, softer wall colors, bring in depth with dark, bold accent colors.
This approach works because it keeps the room’s palette in the same family — your brain registers the shift as intentional rather than jarring.
- Cool palette rooms — add depth with a darker blue, slate, or forest green accent.
- Warm palette rooms — layer in terra cotta, rust, or deep gold to enrich the warmth.
- Neutral rooms — nearly any color works; choose based on the emotion you want to activate.
Next, explore this practical guide that shows you exactly how to: The Complete Guide to Choosing the Best Bedroom Paint Colors: A Designer’s Proven 5-Step Method
IV. The “First Impression” Rule — Focal Point Placement

The most reliable wall color placement principle is deceptively simple: color belongs on the wall your eye finds first. Before you think about hue, undertone, or sheen, ask yourself one question — where does a person look the moment they step through the doorway? That answer tells you where to put the color.
A. The entry view
When you walk into any room, your brain does a fast visual scan and locks onto something. That instinctive landing spot — whether it’s the far wall, a fireplace surround, or a window bank — is your entry view. Paint the wall at or near that sightline and you’ve done 80% of the placement work already.
- Stand in the doorway before touching a paintbrush. Take a photo from that exact position — this is your room’s true first impression.
- If your eyes go to a window, the wall directly opposite that window (which catches reflected light) is usually the strongest candidate for your color.
- Avoid placing accent colors on walls immediately to the left or right of the doorway — they won’t be seen until someone is already inside the room.
Pro tip: Take a photo from the doorway and desaturate it in your phone’s editing tools. In grayscale, the focal point becomes obvious — it’s wherever contrast and depth naturally collect. That’s your placement wall.
B. The anchor wall
Every room has an anchor wall — the surface that carries the room’s structural or visual weight. In a bedroom, that’s the wall behind the headboard. In a living room, it’s behind the primary sofa or the fireplace wall. In a dining room, it’s behind the sideboard or facing the table. These walls hold the room’s largest furniture or its architectural star, which means placing color here reinforces what the room is already doing naturally.
- The anchor wall is almost always perpendicular to the entry view — it’s the wall you walk toward, not the wall beside you.
- Placing color on the anchor wall creates depth by giving the eye a destination. The room feels intentional rather than assembled.
- In bedrooms, headboard wall placement is the most universally recommended choice by color consultants — it frames the focal point without competing with ceiling height or natural light.
Pro tip: If a room doesn’t have a clear anchor — perhaps it’s a multipurpose space or an oddly shaped room — create one before painting. Move the largest piece of furniture to one wall, hang a statement piece above it, and let that arrangement tell you where the color belongs.
C. The symmetry test
Before committing color to a wall, run a quick symmetry check. A wall that’s interrupted by off-center windows, a door at one side, or a jutting column is a risky canvas for bold color. That fragmentation makes the color feel arbitrary rather than considered — it reads as wallpaper that stopped halfway.
- Symmetrical walls — those with centered windows, or no openings at all — are the safest surfaces for strong, saturated colors.
- If your best candidate wall has an off-center element, use that asymmetry intentionally: a darker color can visually balance the lighter side of the wall.
- Walls that are more than 50% opening should almost always stay neutral — the color will be chopped up before it can read cohesively.
Next, explore this practical guide that shows you exactly how to: The One Paint Color That Designers Are Too Afraid to Tell You Works in Every Room
V. Using Color Placement to Fix Room Proportions

Paint doesn’t just decorate — it reshapes. Strategic wall color placement can make a narrow room feel wider, a towering ceiling feel cozier, and a dead-end hallway feel purposeful. These aren’t optical illusions so much as optical corrections — using the eye’s natural tendency to read darker surfaces as closer and lighter surfaces as farther away.
A. Placement by proportion problem
| Problem | Placement fix | Color direction |
| Narrow room | Paint the two short end walls darker | Darker end walls, light side walls |
| High ceiling | “12-inch wrap” — ceiling color bleeds 12″ down the walls | Ceiling tone on top band |
| Long hallway | Paint the far end wall a deep, receding color | Dark far wall draws the eye |
| Low ceiling | Vertical stripes or floor-to-ceiling color on one wall | Vertical pull lifts perception |
B. To widen a narrow room
A narrow room — a galley kitchen, a long bedroom, a thin study — creates a tube effect that feels confining. The fix is counterintuitive: make the shorter walls darker, not lighter. Darker values advance toward the eye, which visually compresses the length and expands the perceived width. Keep the long side walls as light as possible to allow the eye to travel outward.
- Choose a color 2–3 shades deeper than your side walls for the end walls — same color family, darker value.
- This technique works best when the end walls are uninterrupted — no large windows or doors to break the advancing effect.
- A warm dark (terracotta, rust, deep ochre) will feel more intimate; a cool dark (navy, charcoal, deep teal) will feel more expansive despite the depth.
Pro tip: The narrow-room fix doesn’t require an extreme color contrast. A difference of just 2 LRV (Light Reflectance Value) stops between side walls and end walls can shift the room’s perceived proportions noticeably — you don’t need to go from white to black.
Dive deeper with this step-by-step guide on: Calming Paint Colors: The Complete Guide to Creating Your Serene Home Sanctuary
C. To lower a high ceiling — “The 12-Inch Wrap”
Soaring ceilings look architectural in the right space and alienating in the wrong one. The 12-inch wrap solves this: paint the ceiling its chosen color, then continue that same ceiling color 12 inches down the wall. This visual sleight of hand lowers the perceived ceiling height and creates an enveloping, cozy quality — like the room is pulling you in rather than pushing you out.
- The transition line at 12 inches should be clean and level — a chalk line or laser level prevents the sagging effect of a freehand line.
- This technique pairs beautifully with the “color drenching” trend — used together, they create a cocoon-like atmosphere.
- For maximum coziness, choose a ceiling color that’s a warm, muted tone — warm whites, putty, blush, or stone — rather than a high-contrast stark white.
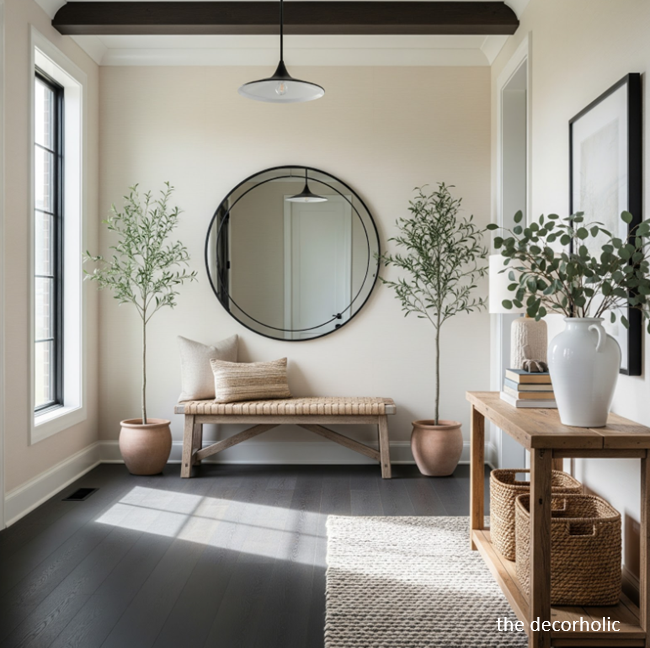
D. The “Endless Hallway” fix
Long hallways often feel like corridors to somewhere rather than spaces worth inhabiting. The fix: paint the far end wall a deep, saturated color. Darker colors recede visually, which creates the paradox of making a long hallway feel shorter — the eye is drawn forward and given a destination rather than a tunnel.
- Deep colors work best here: deep navy, forest green, charcoal, even black. These aren’t accent walls; they’re visual anchors.
- Keep the side walls of the hallway light to contrast with the dark end wall — this amplifies the receding effect.
- Hang a single piece of artwork on the dark end wall to compound the focal point effect.
Pro tip: The hallway end-wall technique also works vertically — painting a stairwell wall in a deep, saturated tone creates a similar “journey” effect, giving the climb a sense of arrival rather than just transit.
Keep reading for a designer-approved guide to: Timeless Paint Colors That Never Go Out of Style
VI. Wall color placement room-by-room
The rules of wall color placement shift depending on the room’s function. A bedroom accent wall serves a completely different purpose than one in a kitchen or hallway. Here’s the room-by-room breakdown.
| Room | Best Wall | Recommended Colors |
|---|---|---|
| Bedroom | Headboard wall | Sage Navy Dusty Blue Deep Charcoal |
| Living Room | Behind sofa or TV | Terracotta Forest Green Warm Gray |
| Dining Room | Behind table or buffet | Deep Red Burgundy Rich Brown |
| Home Office | Behind desk (facing you) | Slate Blue Deep Teal Olive Green |
| Hallway | End wall or full length | Deep color draws the eye, extends perceived depth |
| Bathroom | Opposite the mirror | Bold pattern or tone — reflected for double effect |
A. Bedroom wall color placement
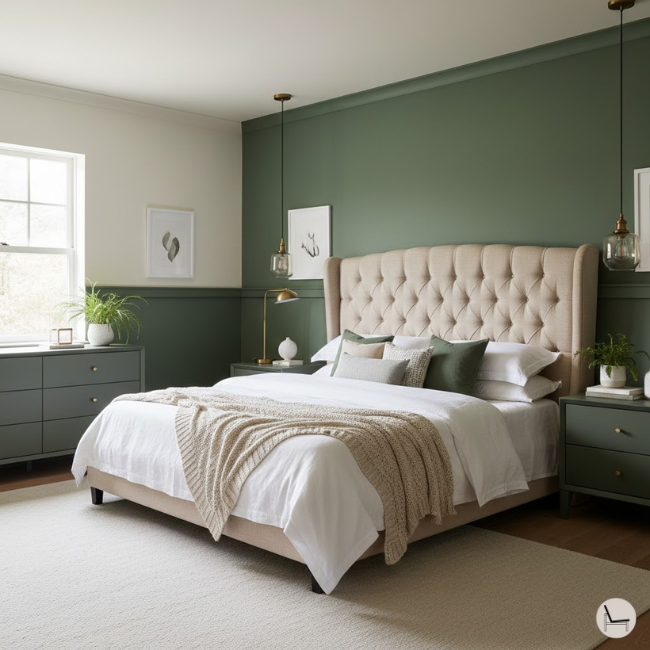
The headboard wall is the gold standard for bedroom wall color placement. In bedrooms, accent walls work well behind the bed to frame and highlight the sleeping area, offering an excellent backdrop for personal art and decor. It anchors the room’s focal point and creates an immediate sense of restfulness or drama — depending on your color.
- Cooler hues (sage, dusty blue, soft teal) promote calm and signal sleep.
- Deeper neutrals (charcoal, moody green) add sophistication without sacrificing peace.
- Avoid placing bold, stimulating colors on the wall directly facing the bed — it’s the last thing you see before sleep.
Pro tip: The headboard wall is one of the most common placements recommended by professional color consultants. If you want to experiment with a dramatic color but aren’t ready to commit to a full room, start here — it’s the lowest-risk, highest-impact placement in any bedroom.
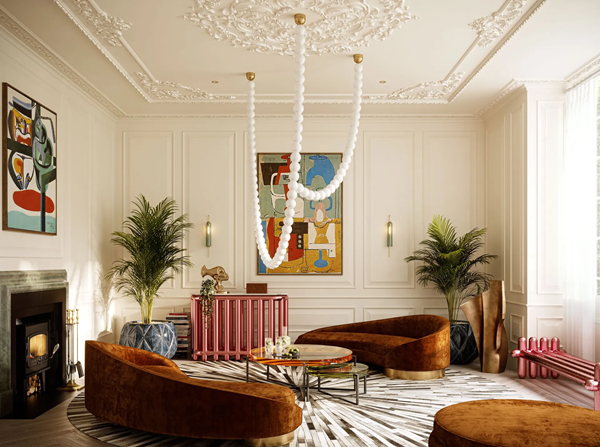
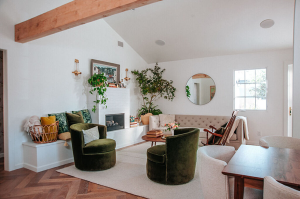
B. Living room wall color placement
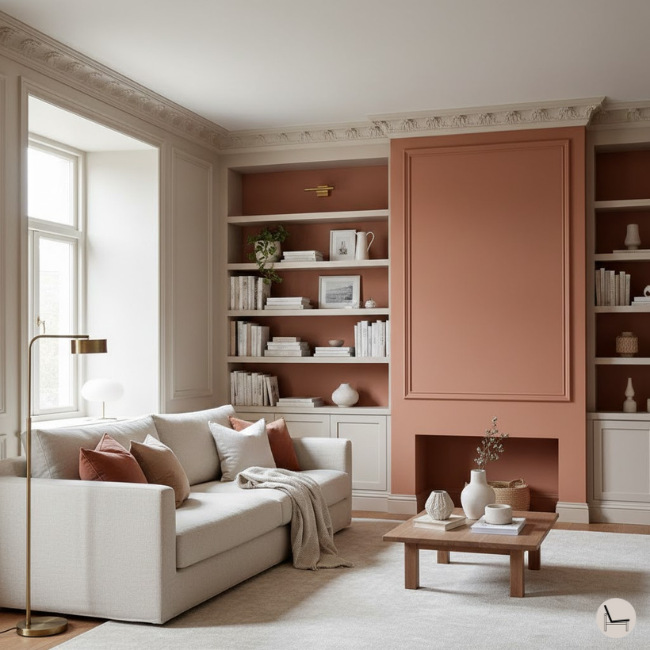
Living rooms often have the most architectural complexity — multiple windows, doorways, and furniture arrangements competing for attention. The most reliable placement is the wall behind the primary sofa or the media console. This creates a backdrop that anchors the furniture grouping without competing with natural light sources.
- In open-plan spaces, a colored wall on the living area side helps visually define the zone.
- Avoid painting the fireplace wall if it already features brick or stone — that texture is the accent.
- If the room has a single architectural statement, such as a large window bay or built-in shelving, let that wall carry the color.
Pro tip: Sometimes an accent wall works better as a cozy corner rather than a single wall — painting an entire nook or recessed area creates natural ending points and gives the color more containment.
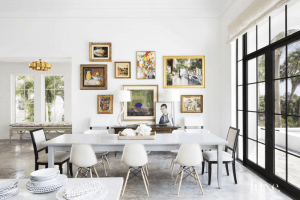
C. Dining room wall color placement

A red accent wall in the dining room adds the perfect pop for a space where both conversation and wine flow effortlessly. Rich, warm tones in a dining room are backed by color psychology — warmer hues stimulate appetite and encourage conversation. The wall behind the buffet or the wall facing diners as they sit is the strongest placement.
- Deep colors (burgundy, forest green, rich brown) work well in dining rooms because the space is used in shorter, deliberate bursts — not all day.
- In open-plan kitchens, the dining accent wall helps delineate the eating zone from the cooking zone.
- Avoid the wall behind where people sit — they won’t see it, and guests will face it all meal.
Dive deeper with this step-by-step guide on: Most Popular Paint Colors To Transform Your Space
VII. The Open-Concept Challenge — Where to Stop the Paint?

Open-concept layouts removed the walls that used to solve this problem for us. When a kitchen flows into a living room flows into a dining nook, where does one color end and another begin? Without a clear answer, paint decisions become arbitrary — and arbitrary paint looks exactly like what it is. The solution is to let the architecture make the decision for you.
A. The natural break
Architecture almost always provides a stopping point — you just have to find it. Interior corners, archways, half-walls, columns, ceiling soffits, and changes in flooring are all natural “stoppers” where one color can end and another can begin without a hard, awkward line. The rule is simple: always stop a color at an interior corner, never at an exterior one.
- An interior corner (where two walls meet inward) naturally hides the transition — the eye reads the shift as two separate planes.
- An exterior corner (a protruding wall edge) exposes the transition completely — two colors meeting there look unfinished or accidental.
- Archways are the cleanest stopping point in any open-plan space — the arch frames the color change as a deliberate threshold between zones.
Pro tip: If your open-plan space has no obvious architectural stoppers, create a visual one with furniture: a large bookcase, a kitchen island, or a freestanding shelving unit can act as a surrogate wall — allowing a color change on either side without needing actual architecture to justify it.
B. The “transition wall” strategy
When two adjacent zones in an open plan need different colors, a hard line is rarely the answer. Instead, use the transition wall strategy: on the wall shared between two areas — say, the wall that both the kitchen and living room can “see” — use a color that’s 10% lighter than the dominant accent color in one zone. This creates a visual gradient rather than a hard cut, and the two areas feel like they belong to the same house rather than two different ones.
- Sample the transition color next to both adjacent colors before committing — it should feel like a bridge, not a buffer.
- This technique works particularly well when both zones share a warm or cool temperature — a warm kitchen and warm living room transitioning through a warm mid-tone feels cohesive.
- Avoid the temptation to use a completely different color on the transition wall. More colors in an open plan create visual noise, not personality.
Dive deeper with this step-by-step guide on: Best 10 Paint Color Combos for a Stunning Home
VIII. Beyond the Four Walls — Placement Trends

The most exciting wall color placement decisions aren’t happening on walls at all. Designers are pushing color into unexpected surfaces — ceilings, trim, lower thirds — and the results are consistently more sophisticated than the traditional single accent wall. These trends aren’t gimmicks; they’re responses to how people actually experience color in a room.
| Trend | Description |
|---|---|
| The Fifth Wall | Ceiling color placement — from subtle tray ceiling depth to full painted canopies. |
| Color Drenching | Walls, trim, doors, and ceiling in the same hue — immersive by design. |
| The Lower Third | Painting only the bottom 36–42 inches of a wall — a faux-architectural wainscoting effect. |
A. The “fifth wall” — strategic ceiling placement
The ceiling is the most underused surface in residential design. In 2026, designers are treating it as a genuine placement opportunity rather than an afterthought. A tray ceiling painted a deep, moody tone — forest green, oxblood, midnight navy — transforms an architectural detail from a builder upgrade into a design statement. Even a flat ceiling, painted the same color as the walls at a slightly deeper value, creates a sense of envelopment that four painted walls alone can’t achieve.
- Tray ceilings: paint the inner recess 2–3 shades deeper than the surrounding ceiling for subtle drama; go full bold for a jewel-box effect.
- Flat ceilings: the “fifth wall” works best in rooms where you spend time looking up — reading rooms, dining rooms, or bedrooms with a canopy feel.
- Keep ceiling color in the same color family as the walls — a contrasting ceiling color is a bolder move that requires precise execution to avoid looking accidental.
Pro tip: When painting a ceiling a deep color, extend it 2–3 inches down the wall before transitioning to the wall color. This prevents the “floating lid” effect where a dark ceiling looks like it’s sitting on top of the room rather than belonging to it.
B. Color drenching — when the rules say paint everything
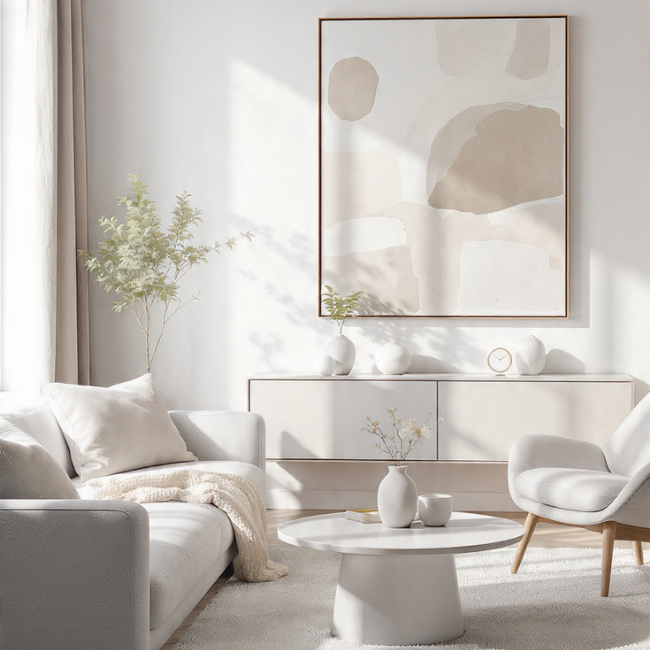
Color drenching is exactly what it sounds like: one color, applied to every surface in the room — walls, trim, ceiling, doors, even radiators. The effect is immersive, sophisticated, and counterintuitively calming. By removing the contrast between surfaces, the eye stops searching for variation and settles into the color’s mood. It’s the polar opposite of the accent wall, and it works for different reasons.
- Deep, muted tones work best for drenching — dusty sage, warm putty, aged terracotta, moody slate. Bright or saturated colors become overwhelming when every surface is covered.
- Vary the finish, not the color: matte on walls, eggshell on trim, and semi-gloss on doors creates subtle surface differentiation while maintaining the drench effect.
- Drenching works in any size room — in small spaces, it eliminates the “edges” of the room, actually making it feel larger rather than smaller.
C. The “lower third” — faux wainscoting effect
If a full accent wall feels too committed, the lower third is the precision alternative. By painting only the bottom 36–42 inches of a wall — roughly the height of traditional wainscoting — you get architectural detail, color impact, and visual grounding without covering an entire surface. It works in rooms where actual wainscoting would be prohibitively expensive, and it adapts to almost any style from classic to contemporary.
- The standard height range is 36 inches (standard chair rail) to 42 inches — measure and mark with painter’s tape before cutting in.
- A deeper color below and a lighter shade above creates a visual “weight” at the base of the room, grounding furniture and making ceilings feel taller by contrast.
- Adding a thin painted “rail” line — 1–2 inches of a slightly deeper shade at the transition — mimics the molding detail of real wainscoting without carpentry.
Pro tip: The lower third works especially well in dining rooms, hallways, and bedrooms. In a bedroom, paint the lower third in a deep, grounding tone and keep everything above it light — the result mimics a low platform bed’s sense of security without any furniture purchase required.
Keep reading for a designer-approved guide to: Color Drenching 101: A Beginner’s Guide to a Cohesive Space

IX. The psychology behind wall color placement decisions

Wall color placement isn’t just aesthetic — it’s neurological. Each color carries its own psychological associations: warm tones like red and orange evoke feelings of energy, passion, and warmth, while cool tones like blue and green are known for their calming and soothing effects. Where you place that color determines how intensely the brain registers those associations.
A color on the wall you face while working hits differently than the same color on the wall behind your back. Placement controls emotional exposure. That’s why the accent wall draws more attention than the primary paint color — making it critical to consider the emotions you want the accent to evoke.
| Color | Psychological effect | Best placement |
| Deep blue / navy | Calm, focused, trustworthy | Home office (behind desk), bedroom headboard |
| Forest / sage green | Restful, grounding, organic | Bedroom, reading nook, living room |
| Warm red / terracotta | Energizing, appetite-stimulating, social | Dining room, kitchen, entryway |
| Charcoal / near-black | Sophisticated, moody, dramatic | Living room, bedroom, home office |
| Dusty pink / blush | Soft, welcoming, intimate | Bedroom, powder room, sitting room |
| Warm yellow / mustard | Optimistic, creative, cheerful | Kitchen, dining area, entryway |
Pro tip: Test your color in place before committing. Lighting can completely change a color both in interiors and exteriors — the same shade can read entirely differently depending on the wall’s exposure to natural and artificial light. Apply a large sample and observe it at different times of day before buying full gallons.
Keep reading for a designer-approved guide to: Color Capping: A Step-by-Step Guide to the Best Color Paint Trend
X. 5 wall color placement mistakes to avoid
Even people with good taste make these errors. Avoiding them will instantly improve any wall color placement decision.
- 1. Painting the wrong wall for the wrong reason — just because a wall is the largest doesn’t make it the focal point. Follow the architecture, not the square footage.
- 2. Ignoring the light direction — a deep, moody color on a north-facing wall with no natural light will absorb the room’s light entirely, making it feel smaller and darker than intended.
- 3. Using too many accent walls in one home — accent walls are done best in moderation and sprinkled within an overall paint strategy. Every room shouldn’t have one. Restraint is what makes each one feel intentional.
- 4. Choosing a color that competes with the furniture — a striking accent wall should complement, not overwhelm, the space. Keep other walls neutral to let the statement wall stand out.
- 5. Skipping the undertone check — a “warm gray” on one wall next to a “cool gray” on the others creates an unsettling mismatch. Always check undertones (green, pink, yellow, blue) before pairing shades, even within the same color family.
XI. Step-by-step: How to plan wall color placement from scratch
Use this sequence for any room you’re approaching with fresh eyes. It eliminates decision paralysis and ensures every color choice has a functional reason behind it.
- 1. Define the room’s purpose — relaxation, productivity, socializing? This determines the emotional register of your color palette before you look at a single swatch.
- 2. Map the light — note which walls receive direct sunlight and at what time. North-facing walls need lighter treatment; south-facing walls can handle deeper tones.
- 3. Identify the focal point wall — this is where the accent color will go. If there’s no clear focal point, create one: anchor furniture, hang art, or add architectural interest first.
- 4. Apply the 60-30-10 rule — choose your primary wall color (60%), then your secondary tone for soft furnishings (30%), and finally your accent wall color (10%).
- 5. Sample before committing — apply large paint samples (at least 12″×14″) to the actual candidate wall and observe them over 48 hours across different lighting conditions.
- 6. Check the exit angles — walk through every doorway that opens into the room. Does the color you’ve chosen create a welcoming first impression from every angle? Adjust placement if necessary.
Pro tip: Consider using augmented reality apps to view potential designs directly on your wall before buying paint. Major paint brands including Benjamin Moore and Sherwin-Williams offer free visualization tools that can save you significant rework.
Most Popular Post:
Interior Design Style Quiz
Timeless Paint Colors That Never Go Out of Style
Create Your Perfect Ergonomic Home Office: A Complete Guide
Must-Have Accessories for Guys: The Secret to a Stylish Space
Modular Sofas for Small Spaces: Brilliant Solutions for Compact Living
XII. Key takeaways – Wall Color Placement Tips
Wall color placement is a discipline, not a decoration afterthought. The color you choose matters far less than the wall you put it on. Follow the architecture. Respect the light. Use the 60-30-10 rule to keep the room balanced. And remember: one intentional accent wall beats five random ones every time.
- Place accent colors behind or facing the room’s natural focal point.
- Use lighting conditions to guide color depth — lighter for low-light walls, richer for well-lit walls.
- Match the color’s psychological effect to the room’s purpose.
- Test samples on the actual wall before committing to full gallons.
- Avoid walls with multiple door or window interruptions.
Ready to put wall color placement into action? Start with one room. Stand in the doorway, find the focal point wall, and let the architecture guide you. If you’d like a personalized color recommendation based on your specific room, drop your details in the comments — or book a virtual color consultation with a certified color expert.
XIII. Wall Color Placement Tips: Frequently Asked Questions
Q1. Which wall should be the accent wall in a bedroom?
The headboard wall is almost always the best choice. It frames the bed — the room’s primary focal point — and creates visual depth without competing with windows or doorways. Choose a color 2–3 shades deeper than your other walls for natural contrast.
Q2. Can you have two accent walls in the same room?
Technically yes, but it dilutes the effect. Two colored walls often compete rather than complement. If you want more color presence, use a deeper shade on one wall and a lighter tint of the same hue on an adjacent wall — this creates depth without visual conflict.
Q3. What is the 60-30-10 rule for wall color placement?
It’s a color balance formula: 60% of the room carries the dominant color (main walls and large furniture), 30% carries a secondary color (rugs and curtains), and 10% carries the accent color (accessories, decor, and one accent wall). This ratio ensures no single color overwhelms the space.
Q4. Does wall color placement affect how large a room feels?
Yes, significantly. Cooler colors applied to the far wall of a narrow room create an illusion of depth, making it feel longer. Warm colors on a side wall can bring it visually closer, making the space feel more intimate. Light colors on a low ceiling wall can make it feel higher.
Should the accent wall be the darkest or lightest wall in a room?
For most rooms, the accent wall should be darker than the surrounding walls — this creates the contrast that makes it stand out. The exception is a room that already has dark walls, where a lighter accent can create striking contrast in the opposite direction.
Q5. Are painted accent walls still in style?
Yes — when done with intention. An intentional, thought-out accent wall never goes out of style. What’s dated is the random accent wall placed without a clear focal point reason. In 2025, the shift is toward textured finishes — limewash, Venetian plaster, and wood slats — rather than flat paint, but the placement principles remain the same.
CATCH THE LATEST IN HOME DECOR TRENDS:
Steal These 16 Expert-Approved Decorating Secrets

How To Accessorize Your Living Room
Small Space? 10 Ways To Make A Room Appear Bigger
Make Your space Look Expensive
GET CAUGHT UP ON ALL THE INSPIRING DECOR TIPS:
18 Fresh Decorating Ideas To Update Your Fireplace
How to Make a Gallery Wall: The Complete Step-by-Step Guide (Even If You’ve Never Hung a Picture)


