TL;DR Summary: Renter friendly hacks are reversible, budget-conscious decorating solutions that allow tenants to personalize rental spaces without risking their security deposit. From removable wallpaper and Command strips to DIY countertop covers and lighting swaps, these proven techniques help renters create beautiful, functional homes while respecting lease agreements and maintaining the ability to restore spaces to their original condition.
Introduction To Renter Friendly Hacks
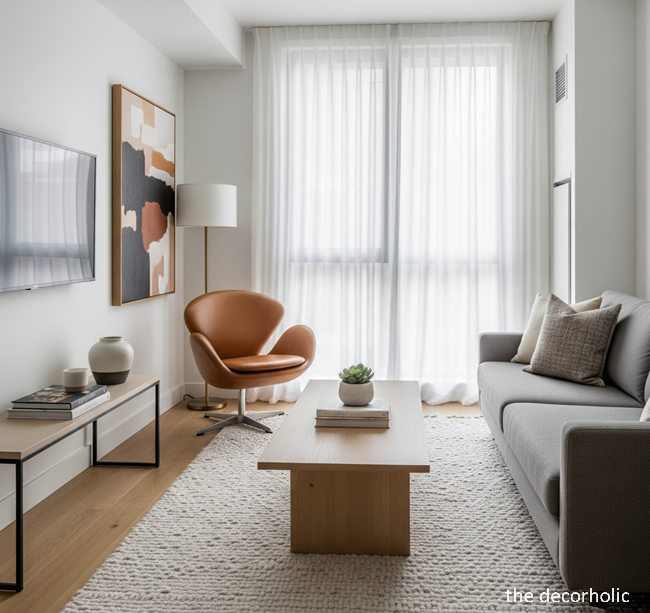
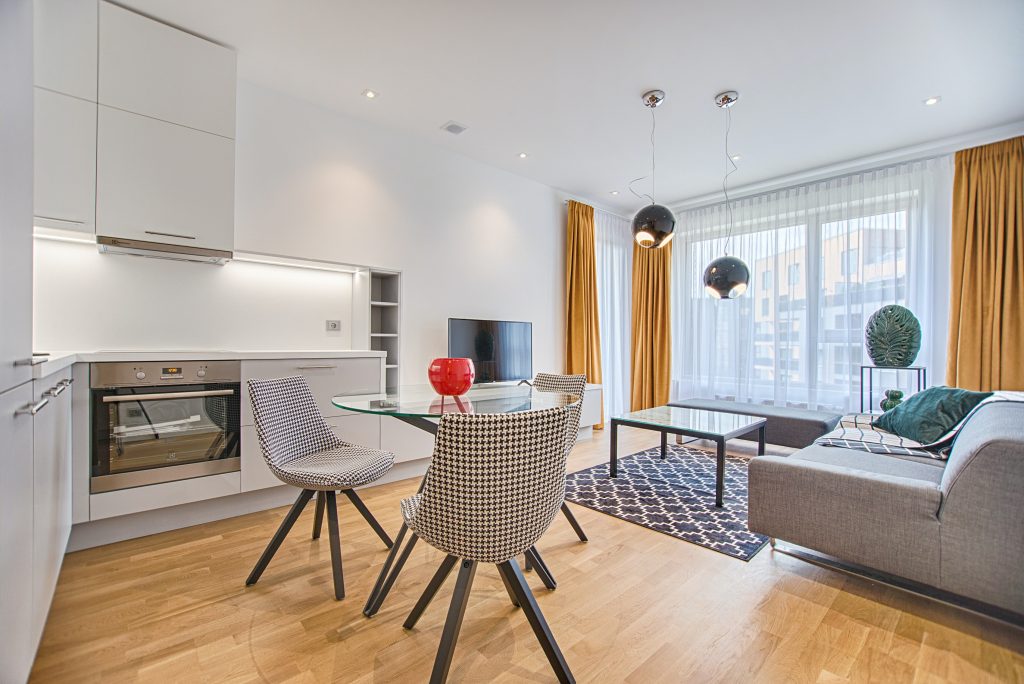
Renter friendly hacks have become essential tools for the 102.7 million Americans living in rental properties who want to transform their temporary spaces into homes that truly reflect their personality and style. You’re staring at those builder-beige walls, outdated brass fixtures, and laminate countertops that scream 1985, and you’re thinking: “There has to be a way to make this place feel like mine.” The frustration is real. You want a beautiful home, but you’re trapped between your design dreams and that security deposit you desperately need back.
Here’s the truth: you don’t need to own a home to live in a space you love. With the right renter friendly hacks, you can completely transform your apartment or rental house into a personalized sanctuary—all while staying within your lease terms and budget. This comprehensive guide will show you exactly how to upgrade every room in your rental using proven, reversible techniques that have helped thousands of renters create stunning spaces they’re proud to call home.
I. What Are Renter Friendly Hacks and Why Do They Matter?

Renter friendly hacks are temporary, reversible design solutions that allow tenants to personalize and upgrade their living spaces without making permanent alterations that could violate lease agreements or forfeit security deposits. These modifications range from simple swaps like changing cabinet hardware to more ambitious projects like installing peel-and-stick flooring, all designed to be completely removable when it’s time to move out.
The rental landscape has shifted dramatically. Research shows that 46% of renters are planning to redecorate their living rooms in 2025, with 44% focusing on bedrooms. Budget constraints remain the biggest challenge, with 43% of renters citing it as their top struggle when personalizing their space, followed by space limitations at 34% and lease restrictions at 30%. Yet despite these obstacles, today’s renters are proving that creativity trumps ownership when it comes to creating beautiful homes.
Designer Nate Berkus captures this sentiment perfectly: “Your home should tell the story of who you are, and be a collection of what you love.” This philosophy applies whether you’re renting or owning. The key difference? Renters need strategic, reversible solutions that work within the constraints of temporary living while still delivering maximum impact.
Quick Tip: Before starting any project, photograph every room from multiple angles and document existing damage. This protects you from being blamed for pre-existing wear and creates a clear record of the property’s original condition. Store original fixtures, paint samples, and hardware in labeled boxes so you can easily restore everything when moving out.
Don’t Miss: The Best Wall Sconces to Transform Your Space
II. Understanding Your Lease: What You Can (and Can’t) Change

The foundation of successful renter friendly hacks starts with knowing your boundaries. Your lease agreement is your roadmap, outlining what modifications are permissible and which ones could cost you your deposit. Most standard leases prohibit permanent alterations like removing walls, changing flooring permanently, or making structural modifications. However, many landlords are surprisingly flexible about temporary changes that add value to the property.
Key steps to navigate lease restrictions:
- Read your lease thoroughly – Look for specific clauses about painting, hanging items on walls, changing fixtures, and making modifications
- Identify what’s explicitly prohibited – Some leases clearly state restrictions while others use vague language requiring clarification
- Schedule a pre-project conversation – Approach your landlord professionally, explain your vision, and emphasize reversibility
- Document all approvals in writing – Get permission via email or written addendum to protect yourself from disputes
- Propose compromises – If painting isn’t allowed, suggest removable wallpaper; if permanent shelving is prohibited, show examples of tension rod alternatives
- Emphasize property value – Frame improvements as enhancements that increase appeal for future renters
Pro Tip: Create a “restoration kit” from day one. Store original light fixtures, cabinet hardware, paint samples, and any items you remove in clearly labeled boxes. Take photos of how everything was installed. When it’s time to move, you’ll thank yourself for this organization, and your landlord will appreciate the seamless restoration.
Also: Apartment Color Scheme: 7 Foolproof Ways to Create a Cohesive Look
III. Budget-Friendly Wall Transformations That Won’t Break the Bank
Walls define your space more than any other element, yet they’re often the most restrictive area in rentals. Fortunately, modern solutions have revolutionized how renters approach wall décor, making it possible to achieve dramatic transformations without a single nail hole or permanent paint change.
1. Removable Wallpaper: The Renter’s Secret Weapon
Removable wallpaper has become the gold standard for renter friendly wall transformations. Unlike traditional wallpaper that requires paste and professional installation, peel-and-stick varieties adhere temporarily and remove cleanly without damaging paint or drywall.
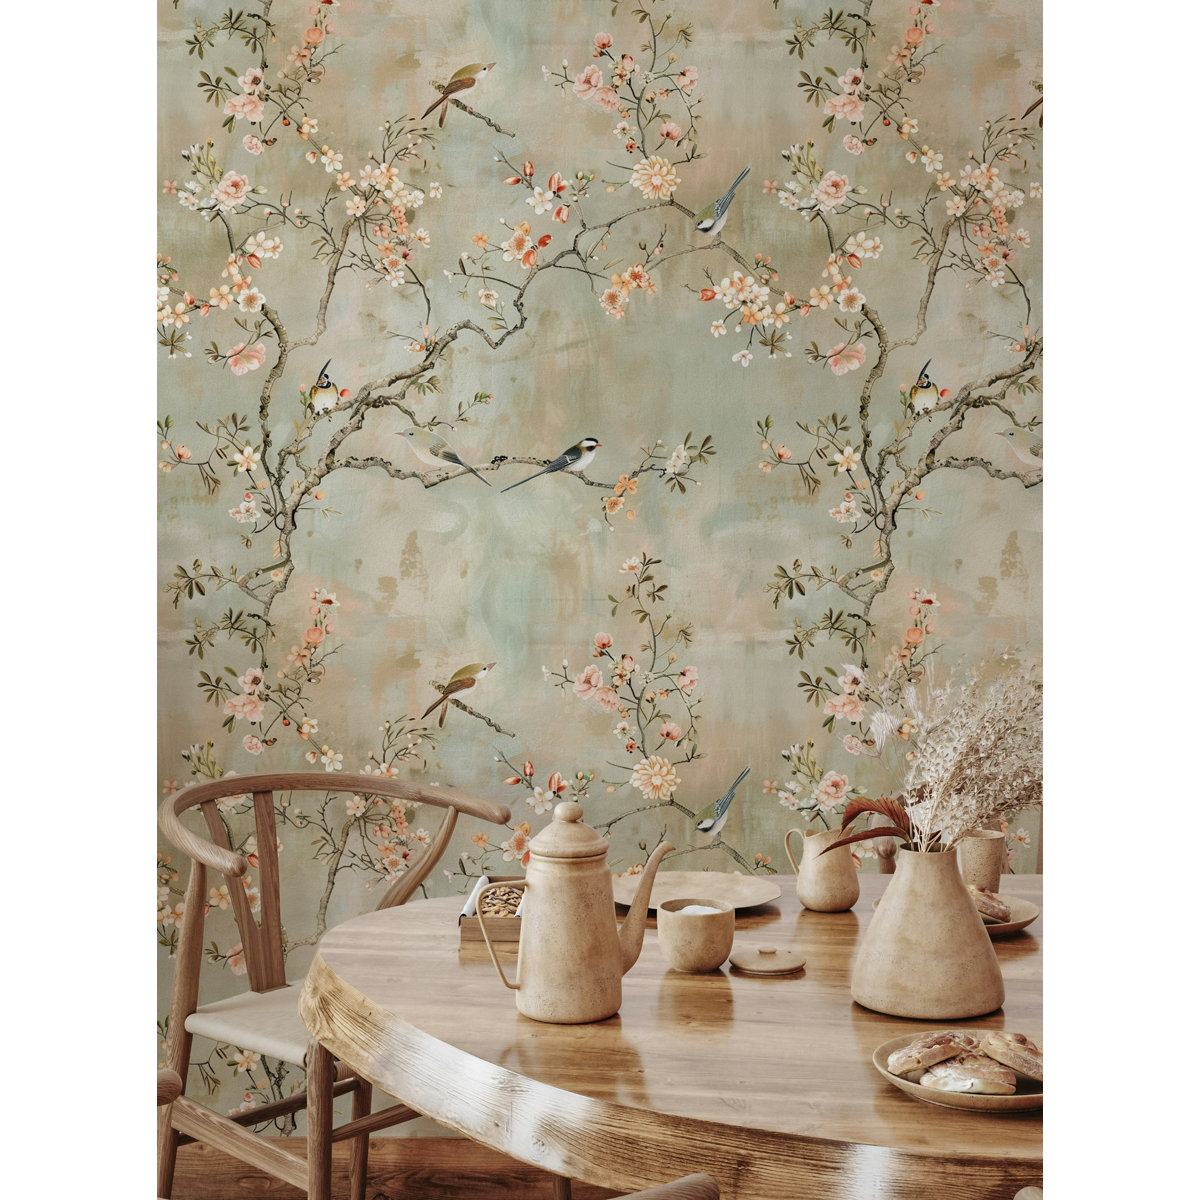
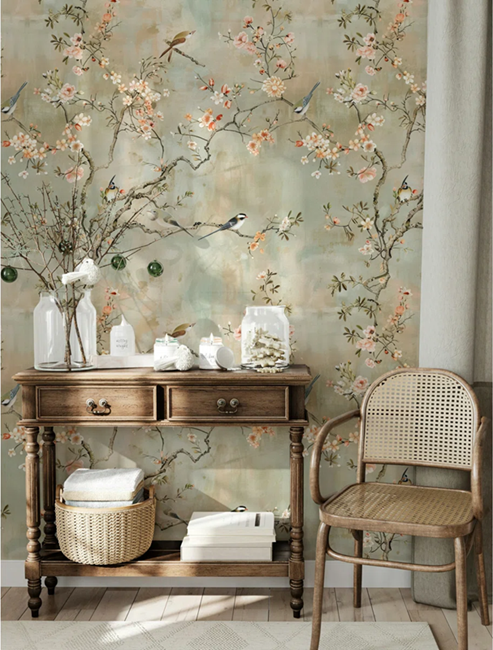
Cherry Blossom Wallpaper Chinoiserie Bryelle Peel & Stick Floral Roll
Transform your space with this elegant peel-and-stick wallpaper featuring delicate cherry blossoms and birds. Its chinoiserie design adds timeless charm to any room, perfect for accent walls and easy DIY updates.
$59.99 per rollShop on Wayfair
Statistics show that 15% of renters now favor this as their go-to personalization strategy because it delivers high impact at reasonable cost—most quality rolls range from $30-$100.
Application essentials:
- Clean walls with rubbing alcohol to remove oils that prevent adhesion
- Test on a small, hidden area first to ensure compatibility with your wall surface
- Apply from top to bottom using a smoothing tool to eliminate air bubbles
Quality matters enormously with peel-and-stick wallpaper. Cheaper versions may not adhere properly or could leave sticky residue when removed. To remove properly, heat the edges with a hairdryer on low setting and pull slowly at a 180-degree angle for the cleanest removal.
Strategic placement ideas:
- Create an accent wall behind your bed for maximum drama without overwhelming the room
- Line the back of built-in shelving for unexpected pops of color
- Focus on small spaces like powder rooms where impact is high but material cost is low
2. The Power of Command Strips and Damage-Free Hanging
Command strips and damage-free hanging systems have liberated renters from the nail-versus-deposit dilemma. These adhesive solutions now support weights up to 16 pounds, making it possible to hang everything from lightweight frames to substantial mirrors without drilling a single hole.

Command 20 lb XL Heavyweight Picture Hanging Strips 20 Pairs (40 Strips)
These heavy-duty Command strips hold up to 20 lbs and are perfect for hanging large frames, mirrors, and décor without nails or damage. The white adhesive blends into walls and removes cleanly.
$19.99Shop on Amazon
Application technique for maximum hold:
- Clean the surface with rubbing alcohol and let dry completely
- Press firmly for 30 seconds to ensure secure bond
- Wait the recommended time (usually 1 hour) before hanging—this is critical for holding power
Create gallery walls using a combination of Command strips for frames and Command hooks for unframed art. This approach adds personality without commitment. If you decide you don’t like the arrangement, simply remove and reposition without worrying about patching holes.
Smart hanging strategies:
- Use multiple strips according to weight recommendations, plus one extra for security
- Layer Command hooks at different heights for dynamic displays
- Combine with leaning art on shelves for a designer-curated look
3. Strategic Paint Choices for Lease-Compliant Color
Paint transforms spaces like nothing else, and many landlords allow it with the understanding that you’ll return walls to their original color before moving out. This “paint and restore” approach has become increasingly common, with some landlords even appreciating the free refresh if you choose neutral colors.
Before you paint:
- Secure written permission from your landlord and document the original paint color
- Purchase a sample quart to test on a hidden area before committing
- Save paint can labels or write specifications inside a cabinet door for easy reference
Choose your colors strategically. While deep navy or charcoal black might look stunning on Pinterest, remember that you’ll need multiple coats of primer and paint to cover it when you move out. Lighter colors like soft sage, warm white, or pale blue are easier to cover and often more appealing to landlords.
The plywood panel hack for no-paint leases:
- Purchase a 4×8 sheet of plywood, attach legs to the back, then paint or wallpaper it
- Add felt pads to corners and lean against wall behind sofa or credenza
- Creates dramatic color-blocked accent wall that’s completely movable
Pro Tip: Keep detailed records of paint colors, brands, and sheens. When it’s time to repaint, you’ll have exact specifications rather than relying on color-matching technology, which can be imperfect. Also, ask your landlord if you can leave your paint color as-is when moving out—many will agree if you’ve chosen something neutral and applied it professionally.
Trending Post: No-Fail Formula to Create a Gallery Wall
IV. Kitchen Upgrades That Make a Massive Difference
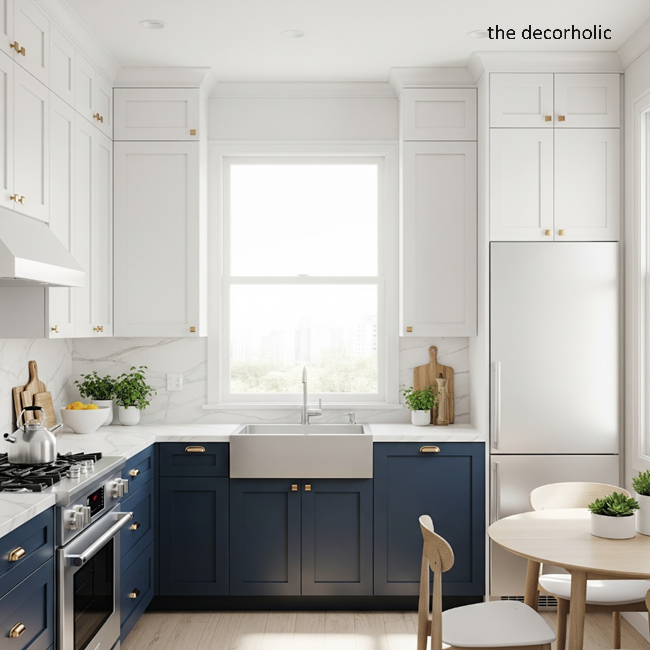
Rental kitchens often suffer from the worst design decisions—think outdated laminate countertops, builder-grade cabinet doors, and appliances that have seen better decades. Yet the kitchen is where you’ll spend significant time, and improving it dramatically enhances your quality of life. These renter friendly hacks target the most visible elements for maximum impact with minimal investment.
4. Countertop Covers: The Ultimate Kitchen Transformation
Creating new countertops right over existing ones represents one of the most dramatic kitchen transformations possible in a rental. Designer Sarah Lonsdale famously used this technique in her St. Helena rental, creating stunning countertops that transformed her dated kitchen into a magazine-worthy space for under $200 in materials.
The basic process:
- Measure precisely and have 3/4-inch plywood cut to fit at your hardware store
- Sand edges smooth, then finish with butcher block oil, paint, or marble-patterned contact paper
- Simply lay over existing counters—no adhesive needed, and completely reversible when moving
This technique requires basic carpentry skills and a weekend’s worth of time. The beauty is complete reversibility: when it’s time to move, simply lift off the covers and your original countertops remain untouched beneath. Some renters even take their custom covers to their next apartment if dimensions match.
5. Hardware Swaps for Instant Style Upgrades
Replacing cabinet pulls, drawer handles, and doorknobs represents the lowest-effort, highest-impact upgrade you can make. This simple swap instantly modernizes any kitchen, costing as little as $50 for basic hardware or up to $300 for premium options. The only tool required? A screwdriver.

SALISENG Solid Brass Kitchen Cabinet Knobs 6 Pack, Brushed Gold Drop Pulls
These modern brushed gold drop pulls are crafted from solid brass and designed for kitchen cabinets, dressers, and wardrobes. Their elegant pendant style adds a luxurious touch to any space.
$29.99Shop on Amazon
Installation in three steps:
- Measure the distance between screw holes on existing pieces to match standard sizes
- Unscrew old hardware and install new pieces—complete kitchen upgrade in under an hour
- Store originals in labeled container for easy restoration when moving
Current trends favor matte black, brushed brass, and champagne bronze finishes that add sophistication to even the most basic cabinets. For a creative, budget-friendly alternative, consider leather drawer pulls made from scraps or old belts—cut strips to size, fold in half, and secure with a single screw for modern Scandinavian aesthetic.
6. Removable Backsplash Solutions
Backsplashes protect walls from cooking splatter while adding visual interest to kitchens. Rental backsplashes often consist of dated tile or, worse, no backsplash at all—just painted drywall accumulating grease stains.

STICKGOO Thicker Design Peel and Stick Tile Backsplash
This 10-sheet set of 12”×12” peel and stick tiles features a thicker design with 3X stronger adhesive backing. Ideal for kitchen and bathroom upgrades, it offers a realistic 3D effect and easy DIY installation.
$39.99Shop on Amazon
Peel-and-stick tile approach:
- Invest in reputable brands designed for backsplash use ($10-$25 per square foot)
- Thoroughly clean and degrease existing surfaces before application
- Test on small, inconspicuous area first to ensure proper bonding and clean removal
For a more elevated look, consider temporary wallpaper designed for kitchen use. Rebecca Atwood wallpaper and other wipeable varieties provide pattern and color while resisting moisture and stains. Apply directly to the wall behind your stove and sink, then remove cleanly when you move out.
DIY plywood backsplash alternative:
- Cut plywood to fit backsplash area, paint or wallpaper as desired
- Secure with removable Command strips or wedge between counter and upper cabinets
- Perfect for kitchens without upper cabinets where it can extend up for storage and visual interest
Pro Tip: For renters dealing with ugly tile backsplash rather than no backsplash, thoroughly clean and degrease the existing tile before applying peel-and-stick options. The cleaner the surface, the better the adhesion and the cleaner the eventual removal. Test your chosen product on a small area first to ensure it bonds properly and removes without damaging the tile underneath.
Trending Post: A Guide to Fiddle Leaf Fig Decor Ideas for a Trendy Home
V. Lighting Fixes That Brighten Every Room

Lighting might be the most overlooked element in rental design, yet it profoundly impacts how your space feels. Poor lighting makes rooms feel cramped, cold, and uninviting, while thoughtful lighting creates warmth, dimension, and mood. The good news? Many lighting fixes require no electrical work and remain completely reversible.
7. Swap Out Basic Light Fixtures
Replacing ceiling-mounted light fixtures delivers dramatic impact, though it requires slightly more skill than other renter hacks. Most ceiling fixtures connect with simple wire nuts and a mounting bracket, making the swap achievable for DIY-comfortable renters. If you’re not confident working with electrical wiring, hire an electrician for this task—the investment (typically $75-150 for labor) is worthwhile for the transformation you’ll enjoy every day.
Safety essentials:
- Turn off power at the breaker and take photos of wire connections before disconnecting
- Match black to black (hot), white to white (neutral), and green to ground screw
- Test before finishing to confirm proper connection
Choose fixtures strategically based on your aesthetic preferences. Matte black fixtures add modern sophistication, while brass and gold tones bring warmth and vintage appeal. For maximum value, invest in timeless designs that you’ll love in your next space too—you can take them with you when you move.
Critical for move-out:
- Store original fixtures in packaging or well-protected boxes with clear room labels
- Include all original hardware and instructions
- Take photos of original installation for reference
8. Plug-In Pendant Lights for No-Wire Installation
Plug-in pendant lights revolutionize rental lighting by delivering the impact of hardwired fixtures without any electrical work. These fixtures feature decorative shades attached to plug-in cords that you swag from ceiling hooks to nearby outlets, and installation takes under 15 minutes.

17 Stories Plug-In Pendant Light Hanging Lamp with Black Barn Pendant Lighting (2-Pack)
This set of two plug-in pendant lights features a black barn-style design with adjustable pulley cords and on/off switches. Perfect for kitchens, bedrooms, or restaurants, they offer flexible installation and industrial charm.
$89.99Shop on Wayfair
Simple installation process:
- Install ceiling hook using Command hook or small nail, hang pendant cord, then drape to outlet
- Use additional small hooks along ceiling for neat cord appearance
- Choose pendants with decorative cords or wrap basic cords with twine or fabric
These work beautifully over dining tables, in dark corners needing task lighting, or as bedside alternatives to table lamps. The result looks intentional and stylish, not makeshift, especially when you choose finishes that match other room hardware.
9. Lamp Strategy for Layered Lighting
Professional designers emphasize that every room needs multiple light sources at different heights to create depth and ambiance. This principle applies equally to rentals, where you might be stuck with a single harsh overhead light.
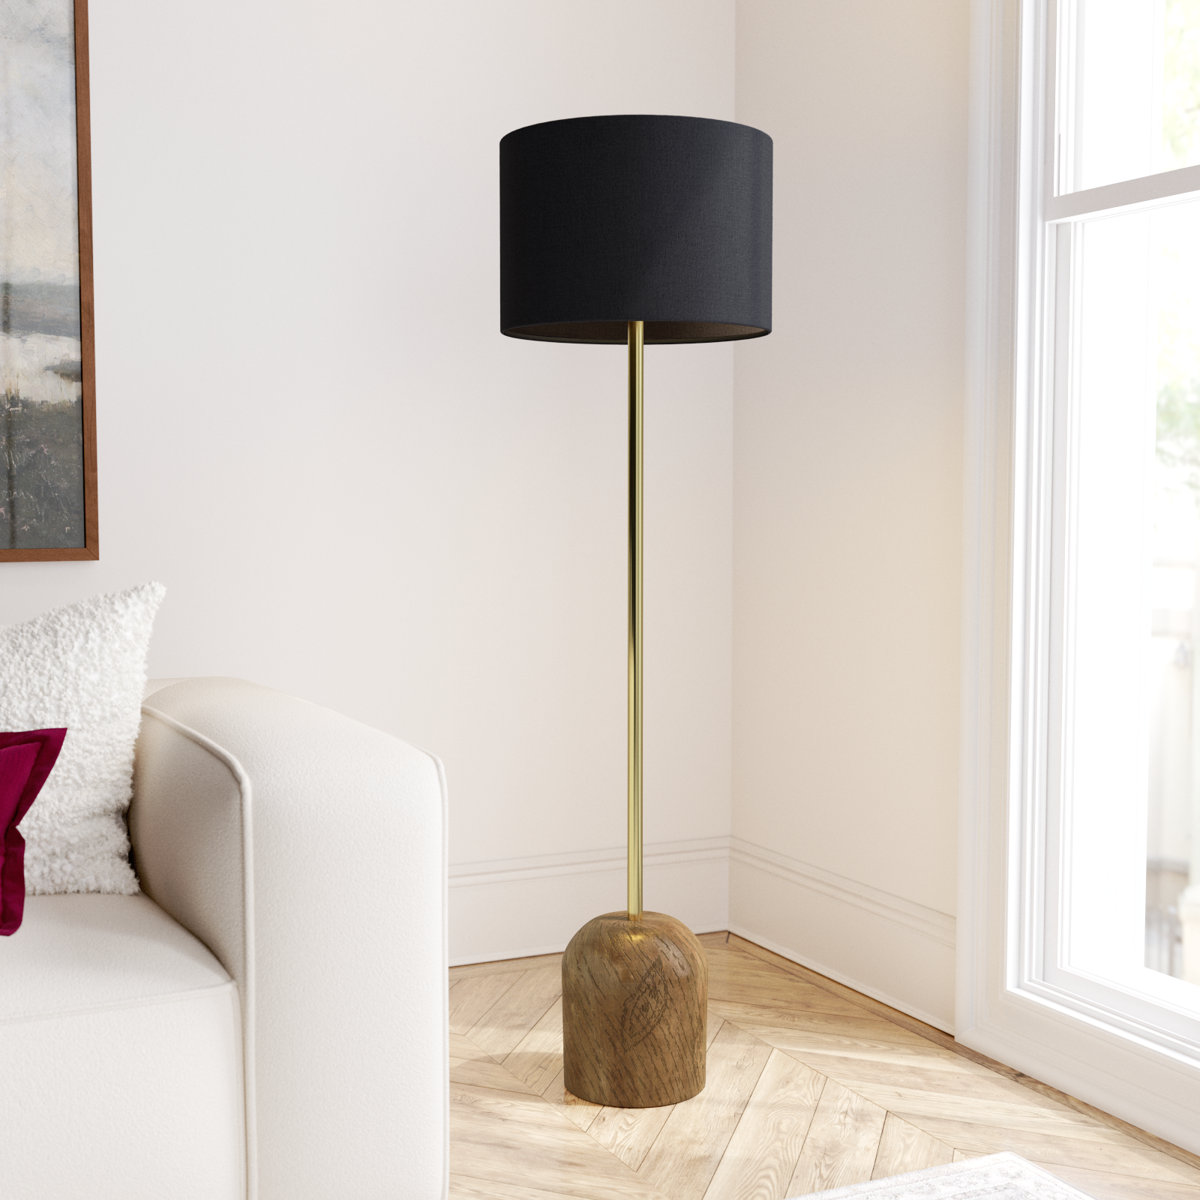
Kelly Clarkson Home Meg Traditional Floor Lamp
This elegant floor lamp features a classic silhouette with a turned base and neutral linen shade, perfect for adding warmth and charm to any room. Designed by Kelly Clarkson, it blends traditional style with timeless appeal.
$109.99Shop on Wayfair
Create layers with three lighting levels:
- Floor lamps in corners eliminate shadows and make spaces feel larger
- Table lamps at eye level create warm, inviting pools of light
- Battery-operated LED strips under cabinets, inside closets, or along shelving add functional lighting

Ivy Bronx Teina Table Lamp
The Teina Table Lamp features a sleek, modern silhouette with a matte black finish and a crisp white drum shade. Perfect for adding ambient light and contemporary style to any room.
$67.99Shop on Wayfair
This layered approach allows you to control lighting based on time of day and activity, creating cozy ambiance for evening relaxation or bright task lighting for working. Motion-activated LED options are particularly useful in closets and pantries, requiring no wiring and adhering with removable strips.
Pro Tip: Replace existing bulbs throughout your rental with warm-white LED bulbs (2700-3000K color temperature). This simple, completely reversible change costs under $20 for most apartments and transforms harsh, cold lighting into warm, inviting illumination. LEDs also dramatically reduce electricity costs—savings that add up over time. Keep original bulbs to reinstall when you move, or leave the LEDs as a move-out gift that future renters (and your landlord) will appreciate.
Don’t Miss: Essential Apartment Must-Haves: A Guide to First-Time Decorating
VI. Bathroom Renovations Without Renovating
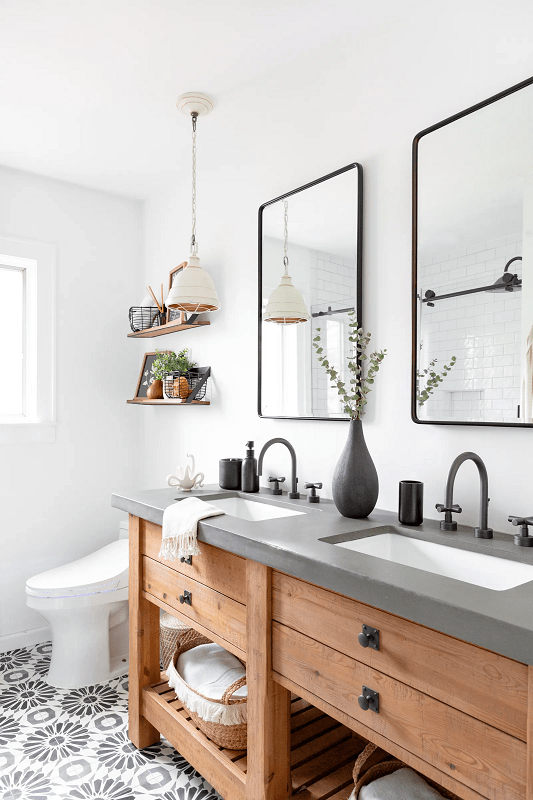
Rental bathrooms range from dated to downright depressing, and major renovations are rarely permitted. Yet bathrooms significantly impact your daily life, and small changes create surprisingly large improvements. These hacks focus on the most visible elements for maximum transformation with minimal effort and investment.
10. Shower Curtains and Accessories
A new shower curtain ranks among the easiest, most affordable bathroom upgrades. Replace basic plastic or outdated patterns with quality fabric curtains in colors or patterns that reflect your style—the transformation is immediate and costs between $20-$80 for curtain and decorative rings.

Eachope No Hooks Polyester Textured Shower Curtain with Snap-in Fabric Liner
This elegant shower curtain features a no-hook design with a snap-in fabric liner and a see-through top window. Made from waterproof and washable polyester, it adds hotel-style luxury to any bathroom.
$29.99Shop on Amazon
Complete the look:
- Add leather ties, brass rings, or unique hooks instead of basic plastic rings
- Replace shower head with high-pressure model (simply screws off and on, no tools needed)
- Choose removable hand-held versions for versatility and easier cleaning
Don’t stop at the curtain. Update other bathroom accessories to create a cohesive look: swap the toilet paper holder, towel bars, and robe hooks for styles that match your new hardware. The difference between builder-grade chrome and modern matte black or brushed brass accessories is substantial enough to make your bathroom feel completely custom.
11. Toilet Seat Upgrade for Unexpected Impact
Replacing your toilet seat seems minor, but this simple swap makes a surprising psychological difference. It’s fresh, it’s yours, and it signals that you’ve elevated your bathroom beyond rental basics. Installation requires only a screwdriver and takes less than 10 minutes.

KOHLER 25875-0 Hyten Elevated Soft Close Elongated Toilet Seat
This elevated toilet seat adds 3 inches of height for enhanced comfort and accessibility. Featuring a soft-close lid, grip-tight bumpers, and quick-attach hardware, it’s designed for quiet, secure, and easy installation.
$92.44Shop on Amazon
Modern options to consider:
- Soft-close hinges that prevent slamming ($30-$60)
- Built-in nightlights for gentle illumination ($40-$80)
- Bidet attachments for spa-like functionality (starting $30)
For renters wanting to elevate their self-care routine, bidet attachments provide luxury-level cleanliness at surprisingly affordable prices. These fit under your existing toilet seat and connect to your water supply with a simple T-valve. Installation takes about 30 minutes, requires no plumbing expertise, and is completely removable when moving.
12. Mirror Magic
The mirror probably came with your rental and probably looks dated. You have several options for improvement without permanent changes, depending on how the mirror is attached.
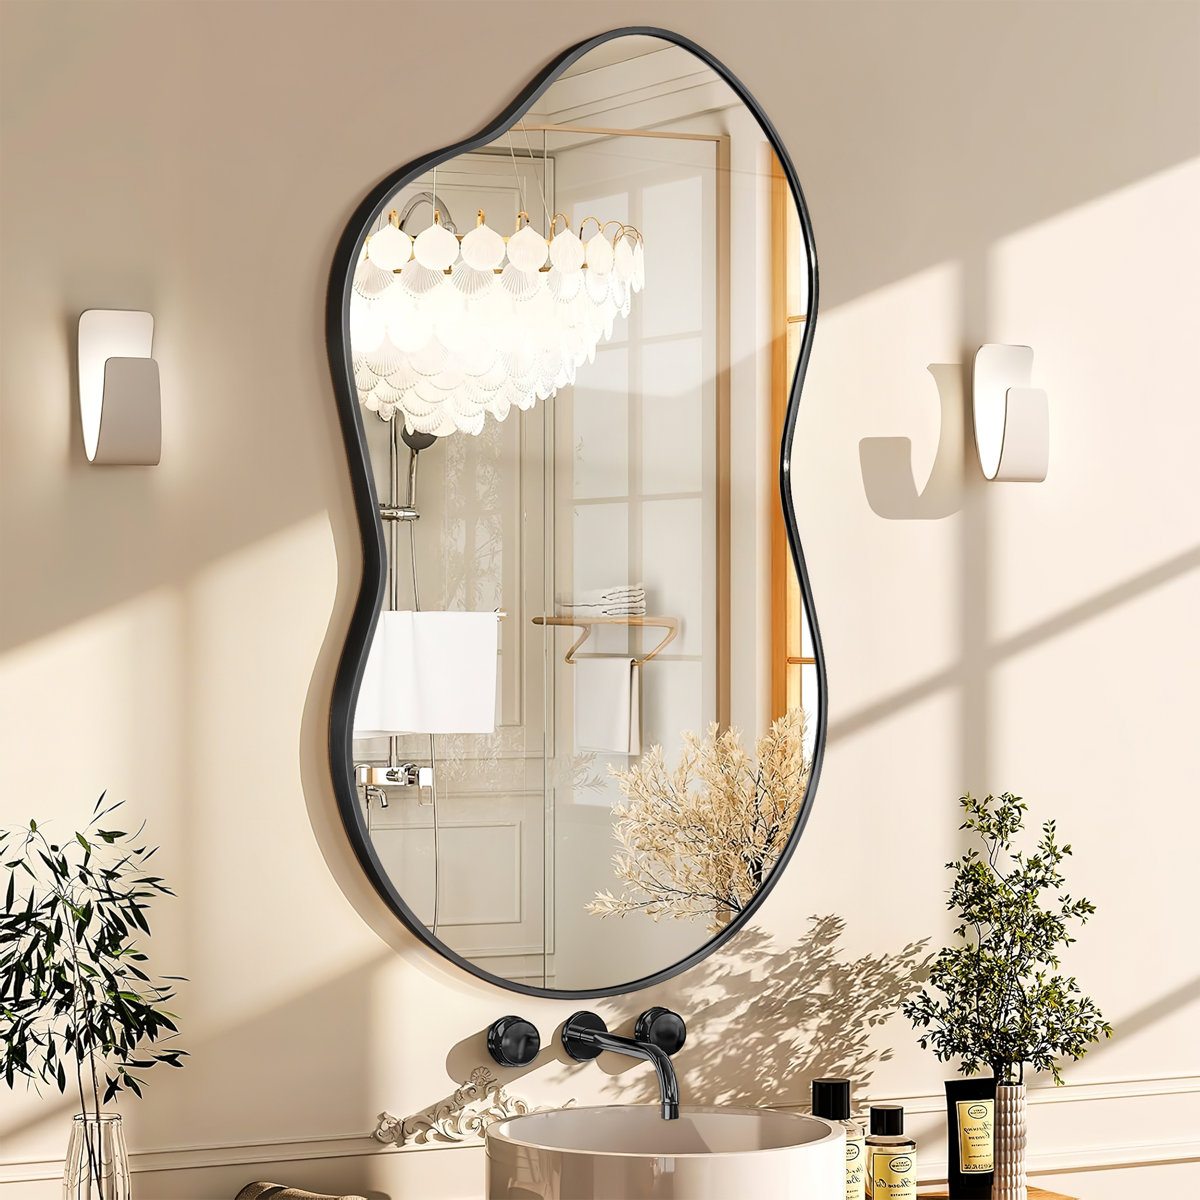
Ivy Bronx Nadara Asymmetrical Metal Wall Mirror
This modern asymmetrical wall mirror features a sleek black metal frame and a unique geometric silhouette. It’s perfect for adding a bold, artistic touch to your living room, bedroom, or entryway.
$189.99Shop on Wayfair
For removable mirrors:
- If attached with clips or brackets, remove entirely and lean new mirror or hang with Command strips
- Large floor mirrors create dramatic impact without hanging
- Heavy-duty Command strips support substantial mirror weight when properly applied
If your mirror is glued directly to the wall (common in apartments), you can’t remove it without damage. Instead, frame around it using trim molding attached with removable adhesive strips or very small nails. Paint or stain the frame to match your hardware finish for a cohesive look that transforms builder-basic into custom statement.
Pro Tip: Upgrade your bathroom’s ambiance instantly with quality textiles. Invest in plush bath mats, oversized bath towels in coordinating colors, and a high-quality fabric shower curtain. These elements require no installation, move with you to your next space, and make your bathroom feel spa-like rather than institutional. Choose a color palette that complements your space and stick with it for all textile purchases to create cohesion.
Don’t MIss: The Ultimate Sofa Buying Guide: How to Choose the Perfect Couch in 2026
V. Floor Covering Solutions That Don’t Damage Original Floors
Rental floors often disappoint—whether it’s worn carpet, dated linoleum, or scratched hardwood you’re not allowed to refinish. Covering problematic flooring with beautiful alternatives protects the original surface while dramatically improving your space’s appearance. These solutions range from simple to ambitious, all completely removable.
13. Layering Rugs for Texture and Style
The simplest floor solution involves strategically layering rugs. This approach works brilliantly for covering worn carpet, adding warmth to cold tile, or protecting hardwood while injecting personality into your space.
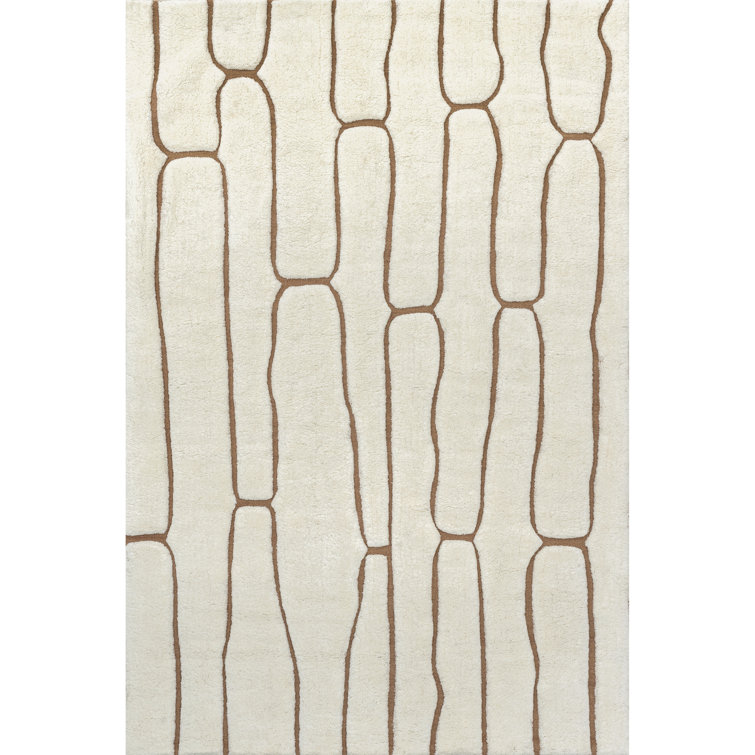
Ivy Bronx Nazco Abstract New Zealand Wool Area Rug
Hand-tufted from 100% New Zealand wool, this abstract area rug features a striking modern design in neutral tones. Its plush texture and artistic pattern make it a standout piece for any room.
$319.00Shop on Wayfair
The layering technique:
- Start with neutral jute or sisal as foundation, add smaller patterned rug on top for interest
- Finish with sheepskin or faux fur in high-traffic areas or reading nooks
- Mix patterns and textures while keeping overall look cohesive
Neutral base rugs can be found affordably at stores like Ikea or via secondhand marketplaces, while you invest more in the smaller statement pieces that define your style. Consider rug placement carefully: in living rooms, ensure at least front furniture legs rest on the rug; in dining rooms, choose sizes where chairs remain on rug when pulled out.
14. Removable Vinyl Flooring Options
For renters ready to tackle a more ambitious flooring project, removable vinyl flooring delivers remarkable results. Click-lock vinyl plank flooring provides more durability and easier removal than peel-and-stick options, creating a “floating floor” that sits atop your existing surface.
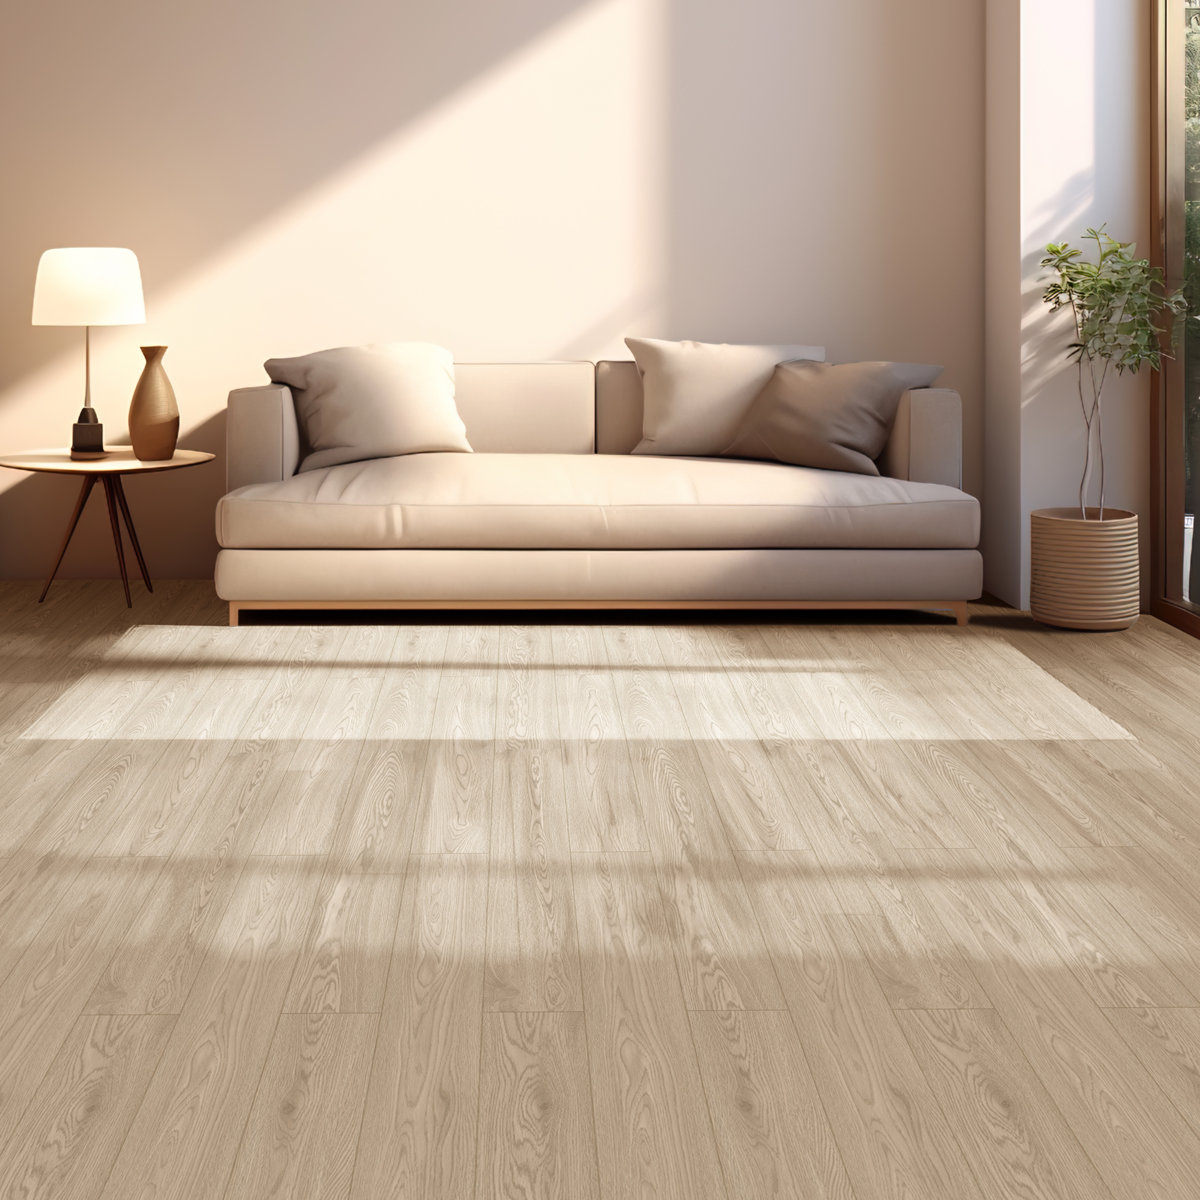
Art3d 48”x7.2” Interlocking Luxury Vinyl Flooring Tile, SPC Rigid Core Wood-Look Floor Plank, Set of 10
These waterproof vinyl planks feature a realistic wood grain finish and a rigid SPC core for durability. Easy to install with interlocking edges, they’re ideal for kitchens, bathrooms, and high-traffic areas.
$89.99Shop on Wayfair
Why click-lock beats peel-and-stick:
- Planks interlock without adhesive, leaving original floor completely untouched
- Installation requires precision cutting and patience but no special tools beyond utility knife
- Cost ranges $1.50-$4 per square foot ($300-800 for 200-square-foot kitchen)
This represents a significant investment for a rental, so consider how long you plan to stay and whether the improvement justifies the cost. When you move, simply disconnect the planks—the original floor remains pristine beneath, and some renters even reinstall them in their next apartment.
15. Painted Plywood for Budget-Friendly Wood Floors
For renters dreaming of wood floors but facing worn linoleum or carpet, painted plywood offers an affordable alternative. This technique mimics painted hardwood at a fraction of the cost, turning tired floors into magazine-worthy surfaces.
The transformation process:
- Measure room precisely, purchase 3/4-inch plywood, and have it cut to fit
- Sand all surfaces smooth, prime and paint with multiple coats for durability
- Simply lay over existing floor—floats above original surface with no adhesive
Popular finishes include white, gray, or wood-look stain. Apply polyurethane top coat for protection and use furniture pads to prevent scratches. This weekend DIY project requires some confidence but delivers dramatic results that remain completely removable when you move.
Pro Tip: Before covering floors with any material, thoroughly clean and repair the original surface. Fill significant holes or cracks, and ensure the floor is level to prevent your covering from buckling or wearing unevenly. Take photographs of the original floor’s condition from multiple angles. This protects you from being blamed for damage that existed before you moved in and provides documentation if disputes arise about your security deposit.
Trending Post: 9 Small Powder Room Genius Hacks
VI. Window Treatment Tricks for Privacy and Style

Window treatments define how your space feels while providing essential privacy and light control. Rentals often come with cheap blinds or nothing at all, leaving you stuck between privacy and design. These solutions add style without permanent installation.
16. Curtain Rod Alternatives
Traditional curtain rods require drilling into walls—not always permitted or desirable. Fortunately, several no-drill alternatives exist that support everything from lightweight sheers to medium-weight curtains.
Tension rod solution:
- Spring-loaded rods wedge between window frames without hardware
- Works for windows up to 72 inches wide, installs in seconds
- Supports lightweight to medium-weight curtains ($10-$30)
For wider windows or heavier curtains, consider Command curtain rod brackets that adhere to walls without nails or screws. These support surprising weight when properly applied to clean surfaces. Alternatively, use ceiling-mounted Command hooks or small removable hooks that leave only tiny holes easily filled with spackling compound.
17. Strategic Curtain Placement
How you hang curtains matters as much as the curtains themselves. Professional designers follow specific placement rules that make windows appear larger and more impressive, transforming even basic rentals into polished spaces.
The designer approach:
- Mount rods as close to ceiling as possible and extend 6-12 inches beyond window frame
- Choose panels that reach floor or puddle slightly for luxurious look
- This makes windows appear larger than actual size while allowing maximum light
Select colors and patterns that complement your overall design scheme—neutral linen for timeless elegance, bold patterns for personality, or room-darkening panels for better sleep. Extra length costs little more but adds significant visual impact, and layering sheers with heavier panels provides maximum versatility.
18. Alternative Window Solutions
For renters who can’t or don’t want traditional curtains, several alternatives provide privacy and style without permanent installation or extensive hardware.

CHICOLOGY Belgian Flax Cordless Roman Shades, Privacy & Light Filtering
These elegant cordless Roman shades offer privacy and light filtering with a soft Belgian flax fabric. Designed for safety and style, they feature a sleek profile perfect for modern interiors.
$66.81Shop on Amazon
Removable window film:
- Adheres to glass with water application, provides privacy while allowing light
- Decorative options from frosted to patterned designs ($10-$30 per window)
- Removes cleanly leaving no residue on glass
Roman shades offer a cleaner, more tailored look than curtains, installing with minimal hardware using small brackets that leave only tiny holes. Choose cordless versions for clean lines and child safety. For renters blessed with beautiful views but cursed with ugly blinds, simply remove and store the existing blinds—many landlords won’t object if you promise reinstallation when moving.
Pro Tip: Blackout curtains or roller shades are essential for quality sleep, especially if you work nights or live in an area with significant light pollution. Choose blackout solutions that attach via tension rods or minimal hardware. The improvement in sleep quality alone justifies this investment, and you can take quality curtains with you to your next rental. Layer blackout shades behind decorative curtains for the best of both worlds—privacy and style.
VII. Storage Solutions for Small Rental Spaces

Limited storage plagues most rentals, forcing creative solutions for clothing, kitchen items, and general life accumulation. These hacks maximize every inch without permanent installation, keeping your space organized and functional.
19. Vertical Space Utilization
Most renters underutilize vertical space—the area from eye level to ceiling that offers tremendous untapped storage potential. Wall-mounted shelving without drilling is possible using adhesive strips rated for shelf weight, or you can invest in freestanding shelving units that lean against walls.

HOMELUX THEORY Over the Door Organizer 55x14x6.7
This heavy-duty over-the-door organizer features 6 large front pockets and 12 side pockets, perfect for maximizing vertical storage in bedrooms, bathrooms, or nurseries. Made from durable non-woven fabric with a soft-touch finish.
$46.49Shop on Amazon
Maximize height strategically:
- Floor-to-ceiling units make rooms feel taller while providing substantial storage
- Over-door organizers hook over any door, instantly creating space for shoes, accessories, or pantry items
- Wall space above desks, between cabinets and ceiling, and in corners all capture otherwise wasted areas
Choose clear pocket organizers for visibility or solid fabric options for a cleaner aesthetic. Ladder shelves and bookshelf dividers offer trendy, no-attachment alternatives that work in any rental.
20. Furniture with Hidden Storage
When purchasing furniture for your rental, prioritize pieces that provide hidden storage, maximizing functionality without requiring built-in solutions. This strategy keeps your space organized while maintaining a clean, uncluttered appearance.
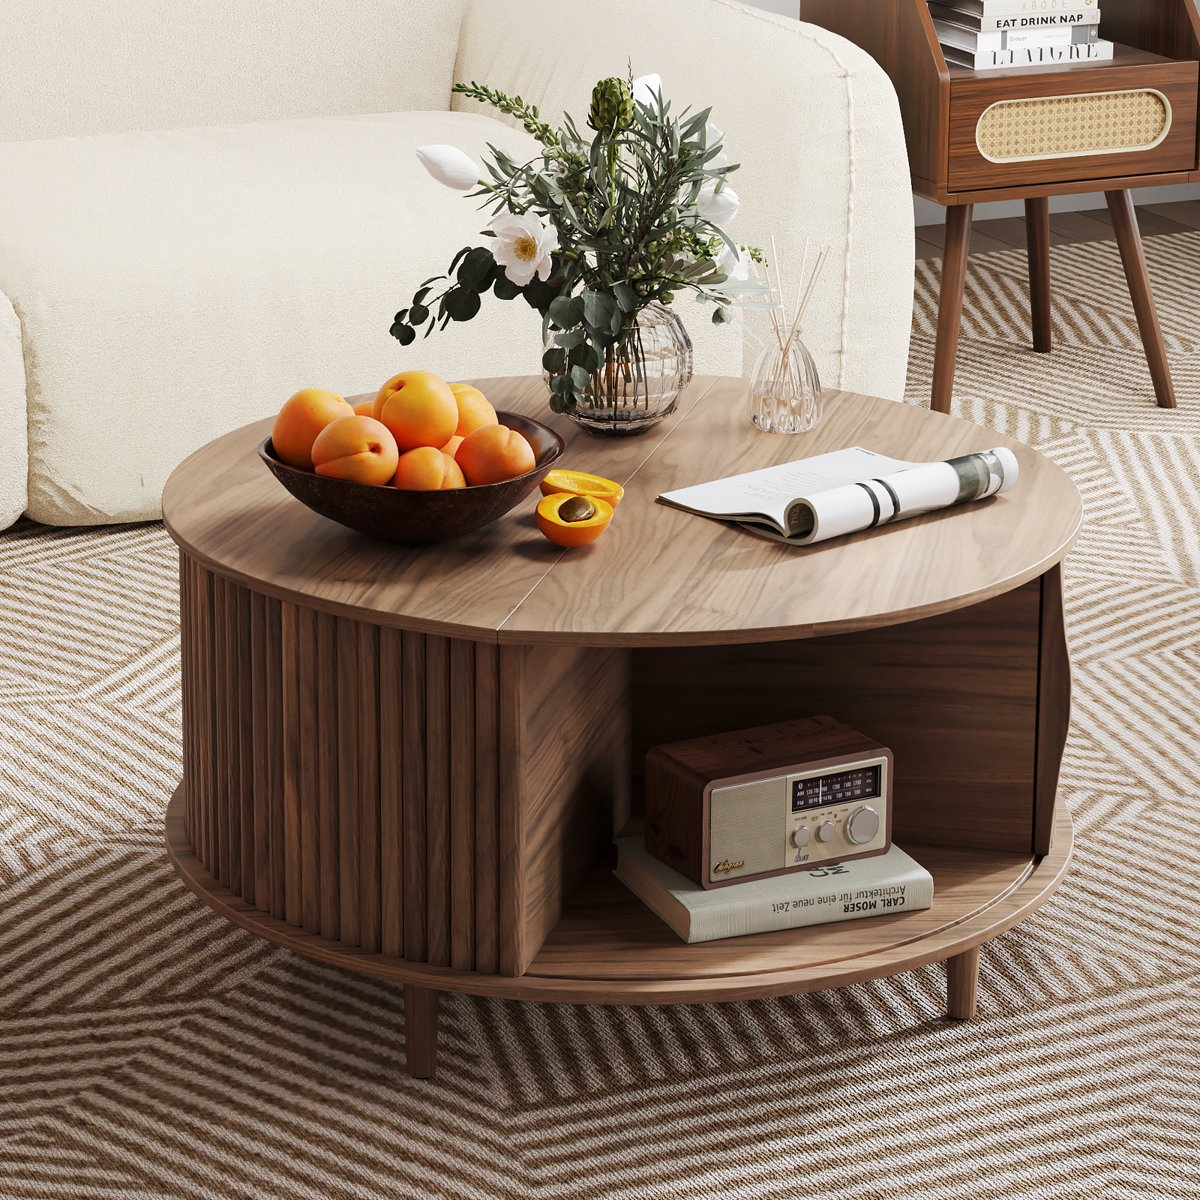
Millwood Pines Mid-Century Modern Round Coffee Table with Storage
This stylish round coffee table features a mid-century modern design with a spacious hidden storage compartment. Its wood grain finish and clean lines make it a perfect centerpiece for any living room.
$189.99Shop on Wayfair
Multi-functional must-haves:
- Ottoman benches store blankets and games while providing seating
- Bed frames with built-in drawers eliminate need for separate dressers
- Coffee tables with lift-tops or lower shelves conceal everyday items
For tight budgets, hack basic furniture into storage solutions: place storage bins under skirted console tables, add risers under beds to create space for containers, or use attractive baskets on open shelving to hide clutter while maintaining visual appeal.
21. Closet Maximization
Rental closets rarely provide adequate storage, but affordable additions transform them from frustrating to functional without any permanent changes to the space.
Essential closet upgrades:
- Second hanging rods (tension-mounted or hung from existing rod) double capacity
- Slim velvet hangers take up 50% less space than plastic or wire versions
- Over-door hooks perfect for bags, belts, scarves, and accessories
For completely minimal closets, consider installing a freestanding wardrobe or modern clothing rack. Today’s options look intentionally stylish rather than college-dorm basic, providing essential hanging space while freeing your actual closet for shoes, folded items, and accessories. Implement “one in, one out” rule and store off-season items under beds to prevent accumulation.
Pro Tip: The Container Store, Target, and Amazon offer extensive systems for closet organization that require no permanent installation. Invest in a cohesive system with matching bins, baskets, and organizers rather than accumulating mismatched storage over time. This creates visual calm and makes finding items easier. Choose neutral colors that will work in your next rental regardless of that space’s color scheme. Label everything—your future moving self will thank you when packing becomes infinitely easier.
Also: A Guide to Selecting Statement Furniture Pieces for Your Home
VIII. Creating Zones in Studio and Open-Concept Rentals

Studio apartments and open-concept rentals require creative space division to feel functional rather than chaotic. Successfully implementing these rental friendly hacks defines separate areas without permanent construction, making the space feel larger and more purposeful.
22. Bookshelf and Furniture Dividers
Large open-back bookshelves, placed perpendicular to walls, are one of the most effective and functional rental friendly hacks for division. They create a natural room divider while simultaneously providing valuable storage space that is accessible from both “sides” of the room.
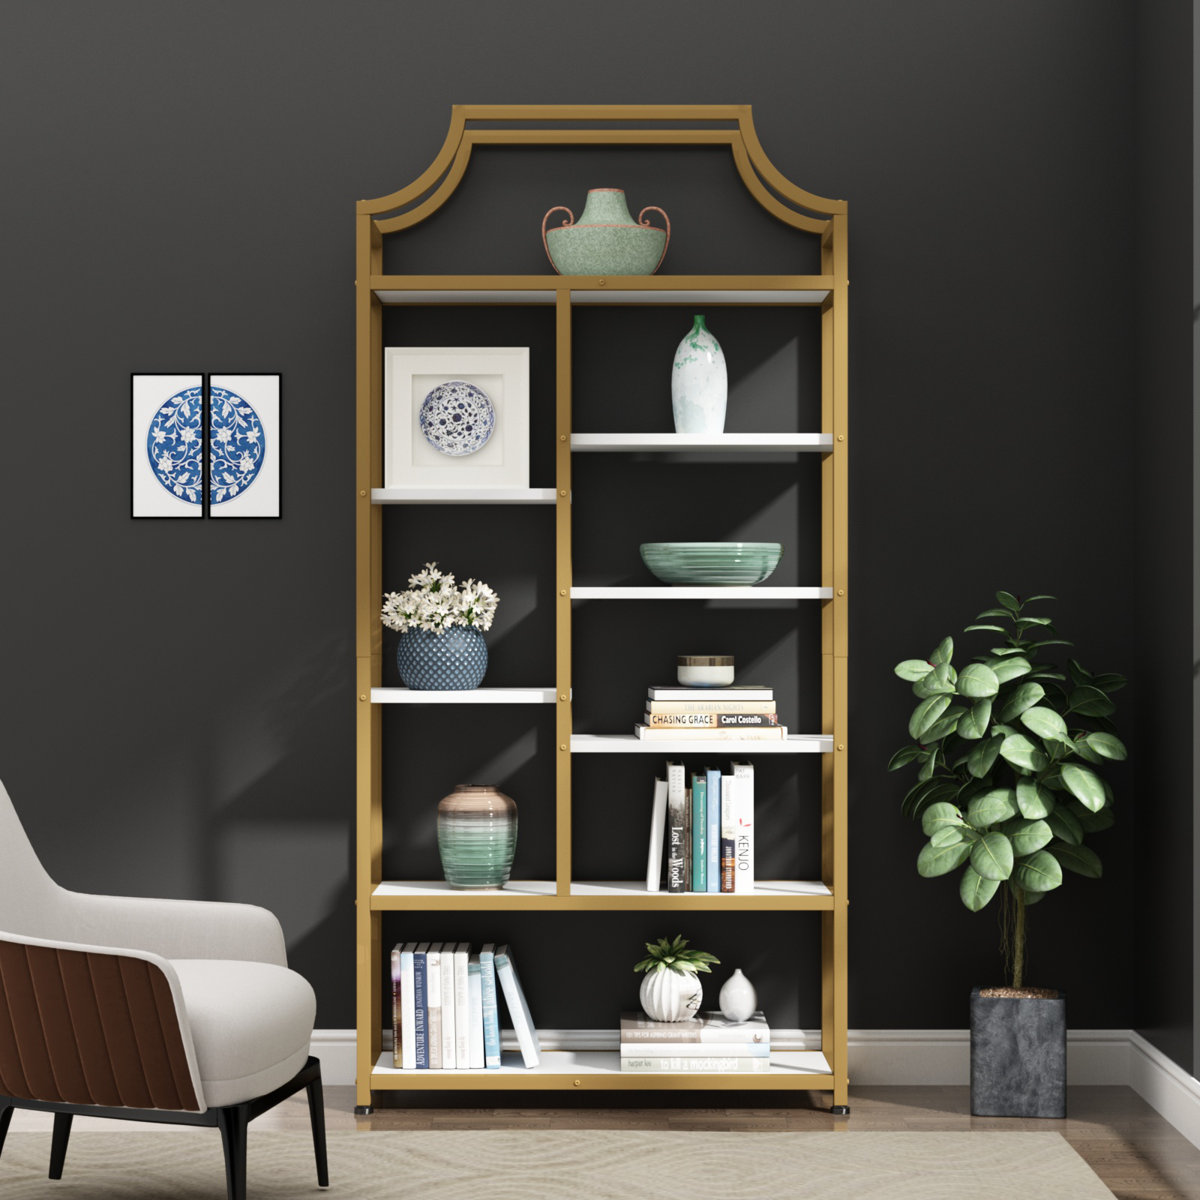
Mercer41 Ghica Etagere Bookcase, 8-Open Shelf Bookshelf, 70.87″ H x 31.5″ L in Gold & White for Home Office
This modern etagere bookcase features eight open shelves with a sleek gold frame and white shelving. Ideal for displaying books, decor, and office essentials with a touch of glam sophistication.
$179.99Shop on Wayfair
Key bookshelf divider strategies:
- Allow Light Passage: Choose open-back or slatted designs that maintain openness and prevent the room from feeling blocked off.
- Ensure Stability: Always secure tall units to the nearest wall or floor to prevent dangerous tipping.
- Style Both Sides: Since both faces will be visible, curate the shelves attractively for cohesive viewing.
Beyond bookshelves, strategic furniture placement is a low-effort, high-impact rental friendly hack for establishing boundaries. By simply pulling items away from the walls, you define the edges of separate functional zones like the living room or dining area.
23. Use furniture to create natural boundaries:
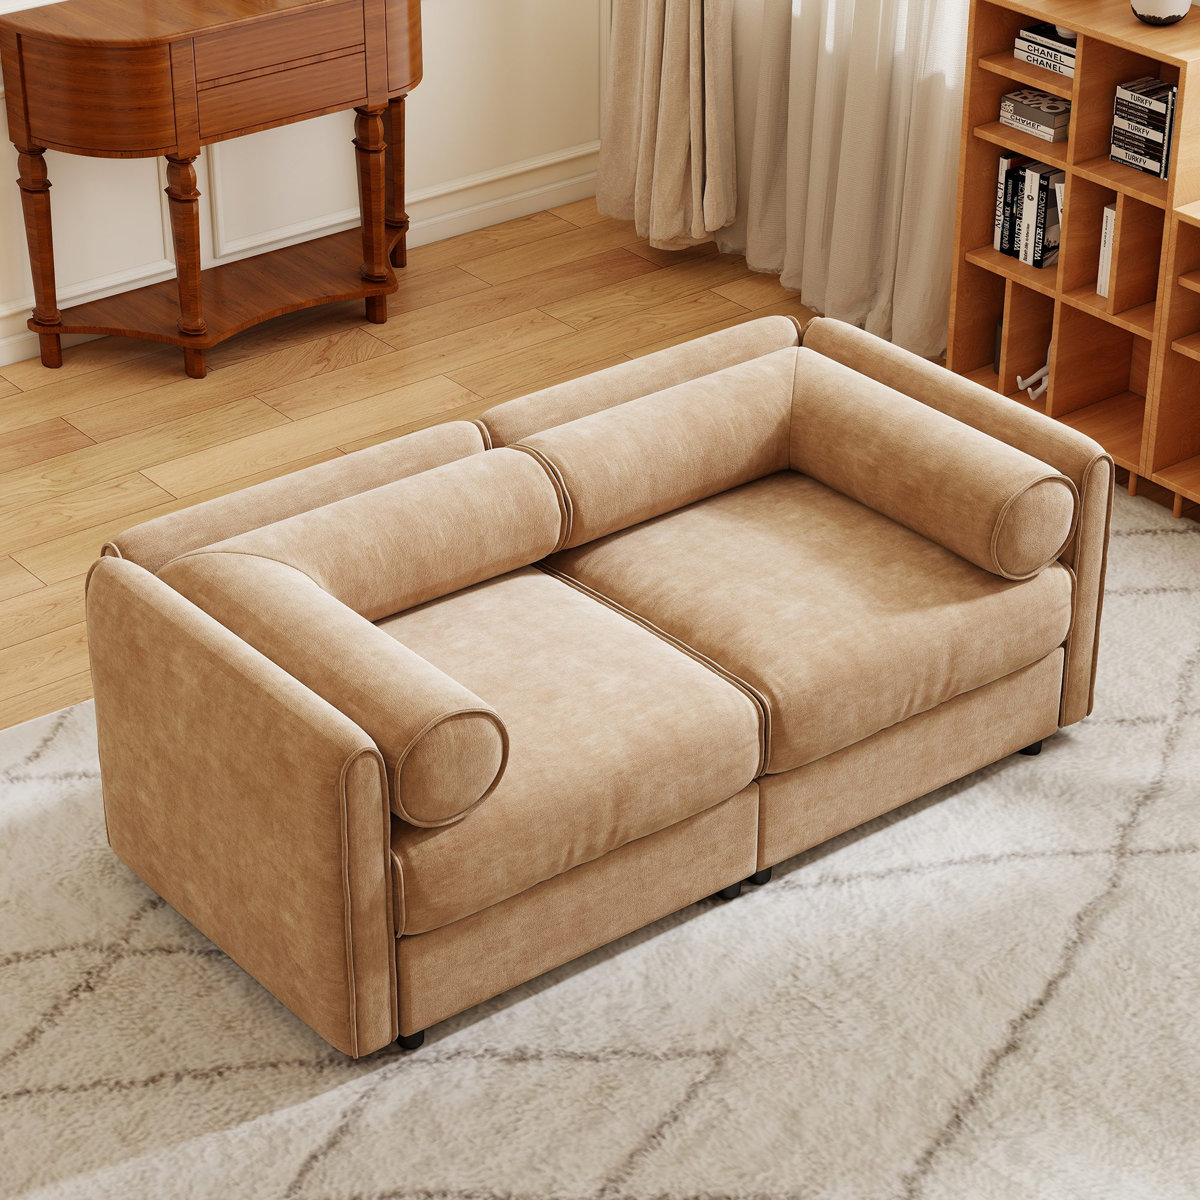
Latitude Run® Upholstered Modular Sofa With Storage Seats
This 75.5″ modular sofa features plush upholstery and hidden storage beneath each seat. Its versatile design is perfect for small spaces, offering both comfort and functionality in a sleek silhouette.
$439.99Shop on Wayfair
- Sofa Placement: Position your sofa away from the wall to clearly define the perimeter of the living room area.
- Area Rugs: Use different rugs in various sizes and textures to instantly signal separate functional zones.
- Behind the Sofa: Add a low console table behind the sofa for extra storage and visual definition.
B. Curtain Dividers
Curtain dividers are a highly flexible and fully temporary solution, perfect for creating soft divisions with fabric. Installing ceiling-mounted tracks or simple tension rods across a span allows you to separate a sleeping area, create a private home office, or conceal storage. This is a favorite among rental friendly hacks because it requires minimal to no damage.
24. Installation options for curtain dividers:
- No-Drill Tension Rods: Ideal for shorter spans, these rods require no drilling and are completely temporary.
- Ceiling-Mounted Tracks: Use removable adhesive hooks or track systems for the most effective, floor-to-ceiling separation.
- Wall-to-Wall Coverage: Ensure the curtain spans the entire width to maximize the feeling of division and privacy.
The fabric you choose dictates the division’s function. While heavy, blackout curtains offer complete privacy and noise dampening, sheer fabrics maintain openness and ensure light continues to flow through the entire rental unit.
Selecting the right fabric:
- Sheer Fabrics: Provide visual separation while maximizing light and air flow throughout the space.
- Blackout Curtains: Deliver complete privacy, perfect for separating sleeping areas in a studio apartment.
- Sliding Flexibility: Use a sliding track system that allows you to easily open or close the division as your needs change.
25. Area Rugs for Definition
Use different area rugs to define separate zones in open spaces. A dining area rug under your table, a living room rug anchoring your seating, and a different style in your sleeping area all create distinct zones without walls or furniture dividers.
Pro Tip: Paint or removable wallpaper can define zones without physical barriers. Paint one wall a different color to create a distinct area, or apply patterned wallpaper to a single wall to separate your sleeping area from your living space. This visual definition helps studio apartments feel like one-bedrooms without reducing square footage or blocking light.
Most Popular Post:
Interior Design Style Quiz
Timeless Paint Colors That Never Go Out of Style
Create Your Perfect Ergonomic Home Office: A Complete Guide
Must-Have Accessories for Guys: The Secret to a Stylish Space
Modular Sofas for Small Spaces: Brilliant Solutions for Compact Living
10 Home Refresh Hacks to Transform Your Space
IX. Bringing It All Together: Your Renter Friendly Action Plan
You’ve learned dozens of renter friendly hacks across every room in your home. Now it’s time to create your personalized action plan that respects your budget, timeline, and skill level while transforming your rental into a space you love.
Prioritize projects by impact and ease:
- Quick wins – Hardware swaps, curtains, light bulbs (hours, immediate impact)
- Weekend projects – Removable wallpaper, fixture replacements (moderate effort, high impact)
- Ambitious undertakings – Flooring, countertop covers (significant time/cost, dramatic results)
- Build momentum – Start small to gain confidence for larger projects
- Assess skills honestly – Know when to DIY vs hire professionals
Set realistic budgets:
- Free or minimal – Rearranging furniture, decluttering, deep cleaning
- $50-200 – Command strips, hardware, curtain rods, light bulbs
- $200-500 – Quality curtains, rugs, lighting fixtures, paint supplies
- $500+ – Flooring, major upgrades, custom solutions
- Remember – Average monthly rent is $1,394; don’t overextend financially
Document everything thoroughly:
- Before photos – Multiple angles of every room and surface
- Save all originals – Hardware, fixtures, materials in labeled boxes
- Keep receipts – Proof of purchases and restoration costs
- Paint information – Color names, brands, sheens written down
- Installation guides – Makes restoration seamless when moving
- Landlord communications – All approvals in writing via email
Maintain landlord communication:
- Share plans before executing – Especially for visible changes like painting
- Emphasize reversibility – Reassure that everything can be restored
- Document approvals – Get written permission via email
- Show examples – Pictures help landlords visualize your vision
- Build trust – Transparency prevents disputes and protects deposits
- Many landlords appreciate – Tenants who improve properties responsibly
The permission to invest philosophy:
Don’t wait for perfect homeownership before creating beautiful space. Life happens now, not in distant future when you’ve saved a down payment. These renter friendly hacks give you permission to invest in your present home, creating spaces that support your wellbeing and reflect your personality—all while respecting the temporary nature of renting.
Key reminders:
- Your rental deserves same care you’d give a owned home
- You deserve beautiful space regardless of housing situation
- Temporary doesn’t mean it can’t be meaningful
- Small changes create significant impact
- Take successful upgrades to your next rental
- Building a home is about feeling, not ownership
Remember what Winston Churchill wisely noted: “We shape our homes and then our homes shape us.” Your rental deserves thoughtful design because you deserve to live in a space that inspires, comforts, and reflects who you are.
Trending Post: 8 Interior Styling Tips and Secrets to Refresh Any Room Instantly
X. Renter-Friendly Hacks: Frequently Asked Questions (FAQ)
Q: How much should I expect to spend on renter friendly upgrades?
A: Spending varies enormously based on your space size and chosen projects. Basic improvements like Command strips, updated hardware, and new curtains can transform a one-bedroom apartment for $200-400. More ambitious projects including removable flooring, lighting swaps, and paint can range from $500-1500. Budget-conscious renters should prioritize high-impact, low-cost changes first, then tackle bigger projects as finances allow. Remember that quality tools and materials you’ll take to your next rental represent better investments than cheap disposable solutions.
Q: Do I need my landlord’s permission for renter friendly hacks?
A: It depends on the specific modification and your lease terms. For completely reversible changes that don’t alter the property (like furniture arrangements, removable wallpaper, or Command strips), you typically don’t need permission. However, for more visible changes like painting walls, replacing light fixtures, or installing floating floors, always get written approval from your landlord first. This protects you from lease violations and potential loss of your security deposit. Most landlords appreciate tenants who communicate openly about improvements, especially when you emphasize reversibility and offer to restore everything when moving out.
Q: What’s the best renter friendly hack for the biggest impact?
A: Paint (if allowed) or removable wallpaper delivers the single biggest transformation for your investment. Changing wall color dramatically shifts how a space feels and costs relatively little. For spaces where painting isn’t allowed, focus on three high-impact areas: lighting (swap fixtures and add layered lighting), window treatments (install curtains that reach from ceiling to floor), and hardware replacement (update cabinet pulls, doorknobs, and bathroom fixtures). These three changes combined can make a rental feel completely custom for under $500.
Q: How do I remove peel-and-stick products without damaging walls?
A: The key to clean removal is patience and gentle heat. For removable wallpaper and peel-and-stick tiles, use a hairdryer on low heat to warm the adhesive, which softens it for easier removal. Pull slowly at a 180-degree angle (pulling back on itself) rather than straight out from the wall. Work in small sections and never rush the process. For any remaining adhesive residue, use a plastic scraper and adhesive remover designed for delicate surfaces. Always test removal in an inconspicuous area first. Quality products from reputable brands generally remove more cleanly than budget alternatives, so investing in better materials pays off during move-out.
Q: Can I take my renter friendly upgrades to my next apartment?
A: Absolutely! That’s one of the major benefits of renter friendly hacks. Light fixtures, cabinet hardware, shower heads, curtain rods, curtains, removable wallpaper (if carefully removed), rugs, furniture, and even some flooring solutions can move with you. This is why it’s worth investing in quality pieces you genuinely love rather than cheap temporary solutions. When planning upgrades, consider choosing timeless, neutral options that will work in various spaces. Store all original fixtures and hardware so you can restore your current rental to its original condition, then install your upgraded pieces in your next home.
Q: What should I do if my landlord says no to a proposed upgrade?
A: First, try to understand their concerns. Are they worried about damage, the time investment to restore it, or the appearance? Address these concerns directly by showing examples of successful reversible installations, offering a higher security deposit, or providing references from previous landlords. If they remain firm, respect their decision and explore alternative solutions. For example, if painting isn’t allowed, use removable wallpaper or the leaning plywood panel hack. If permanent shelving is prohibited, invest in high-quality freestanding units. There’s almost always a renter friendly alternative that achieves similar results without violating lease terms.
Q: How long does it take to restore a rental to its original condition?
A: With proper planning and organization, most renters can restore their apartments in 1-3 days. The key is maintaining good records and storing all original items systematically. Simple swaps like reinstalling original hardware, light fixtures, and shower heads take minutes each. Repainting walls to original colors typically takes a day for a one-bedroom apartment. Removing peel-and-stick flooring or wallpaper takes several hours depending on square footage. The renters who struggle most during move-out are those who didn’t document original conditions, lost original fixtures, or forgot paint color information. Proper preparation makes restoration straightforward and stress-free.
Q: Are renter friendly hacks worth it if I’m only staying for a year?
A: This depends on your budget and how much the improvements will enhance your daily life. For short-term rentals, focus on quick, inexpensive changes that deliver maximum impact: Command strips for artwork, updated light bulbs, affordable curtains, and small hardware swaps. Skip major investments like flooring or expensive light fixtures unless you plan to take them to your next place. Remember that you spend every single day in your home—even a year is 365 days. Small improvements that make you happier and more comfortable each day often justify the modest investment, especially for changes costing under $200 that take minimal time to install and remove.
Q: What’s the most common mistake renters make with DIY upgrades?
A: The biggest mistake is failing to document everything before starting. Take comprehensive photos of your rental’s original condition from multiple angles, save all original hardware and fixtures in labeled boxes, and keep detailed records of paint colors and products used. The second most common mistake is choosing cheap materials that don’t adhere properly or leave residue when removed. Investing in quality peel-and-stick products, hardware, and fixtures costs slightly more upfront but saves money and stress during move-out. Finally, many renters skip the critical step of testing products in inconspicuous areas before full installation, which can reveal incompatibility issues before they become expensive problems.
Subscribe To the Newsletter!
Subscribe now for an endless feed of inspirational women’s cave decor ideas, pampering rituals, and more tips for curating your ultimate escape. Let’s start making your cozy refuge a reality – you so deserve this!
CATCH THE LATEST IN HOME DECOR TRENDS:
Steal These 16 Expert-Approved Decorating Secrets

How To Accessorize Your Living Room
Small Space? 10 Ways To Make A Room Appear Bigger
Make Your space Look Expensive
GET CAUGHT UP ON ALL THE INSPIRING DECOR TIPS:
18 Fresh Decorating Ideas To Update Your Fireplace
How to Make a Gallery Wall: The Complete Step-by-Step Guide (Even If You’ve Never Hung a Picture)


