TL;DR: This comprehensive guide provides tested methods for transforming rental walls without damage, including wall texture compatibility charts, professional removal techniques, and curated product recommendations that protect your security deposit while creating a personalized space.
Introduction: Your Walls Deserve Better (And So Does Your Wallet)
You’re staring at blank apartment walls again. They’re beige. They’re boring. And every time you consider hanging something, that nagging voice whispers: “What about the security deposit?”
Here’s the truth most decorating blogs won’t tell you: The average renter loses $240 of their security deposit to wall damage—and half of it comes from well-intentioned decor attempts gone wrong. You wanted renter-friendly wall decor solutions. Instead, you got sticky residue that pulled off the paint, “damage-free” hooks that left craters, and that horrifying moment when you peeled back wallpaper and half the drywall came with it.

This isn’t another generic listicle telling you to “just use Command strips.” This is the technical playbook professional stagers use when they need to style apartments that must return to pristine condition. You’ll learn the chemistry behind why adhesives fail, the wall texture compatibility most renters don’t know exists, and the exact removal protocols that save your deposit.
The promise: By the end of this guide, you’ll have a curated apartment that finally feels like yours—and the confidence that every single piece of renter-friendly wall decor will come down as cleanly as it went up.
I. The Renter’s “Before You Hang” Checklist
You cannot skip surface preparation—it’s the difference between decor that stays put for years and adhesive failure in 48 hours. Most apartment wall decor disasters happen because renters treat their walls like a blank canvas when they’re actually a complex surface of texture, paint chemistry, and hidden contaminants.
Let me be direct: that seemingly clean wall? It’s coated in a microscopic film of cooking oil, dust, and off-gassing from paint. Adhesives need a chemically clean surface to bond, and this is where 90% of renters fail before they even start decorating.
A. The Alcohol Rule (Not Negotiable)
Wipe down every hanging area with 70% Isopropyl Alcohol on a microfiber cloth. Not Windex. Not all-purpose cleaner. Here’s why: glass cleaners leave a waxy residue that acts as a release agent. Your Command strips might hold for a week, then catastrophically fail at 2 AM, taking your framed print—and your paint—with it.
The process: Work in 2-foot sections, wiping in circular motions. Let the alcohol fully evaporate (about 60 seconds) before applying any adhesive. For textured walls, use a soft-bristle brush first to remove dust from crevices.
B. The Cure Time Secret
Here’s the manufacturer detail buried in fine print: Command strips require a full hour of “cure time” under pressure before you hang your item. Press the strip firmly against the wall for 30 seconds, then wait 60 minutes before loading it with weight. During this time, the acrylic adhesive is forming molecular bonds with your paint. Rush it, and you’re relying on maybe 40% of the strip’s actual holding power.
I learned this the hard way when a “5-pound rated” strip dropped a 3-pound mirror because I hung it after 10 minutes. The strip was fine. The bond wasn’t ready.
C. The Lease Loophole Most Renters Miss
Read your lease’s exact language about “property damage.” Many standard leases distinguish between:
- Damage: Holes larger than a small nail, torn drywall, permanent stains
- Normal Wear and Tear: Picture hook holes, minor scuffs, faded paint from sunlight
The controversial truth: Some property managers actually prefer a tiny finishing nail hole over adhesive residue. Why? Nail holes take 30 seconds to spackle. Adhesive damage often requires repainting the entire wall to match sheen. If your lease allows “small nail holes,” consider using proper picture hangers rated for your wall type instead of assuming “damage-free” adhesives are always safer.
💡 Pro Tip: Take detailed photos of your walls the day you move in, including close-ups of existing imperfections. This documentation has saved countless renters from being charged for pre-existing damage.
You’ll Also Like: The Best Performance Fabric Sofas for Real Life (Kids, Pets & Spills Welcome)
II. Compatibility: Will It Stick to Your Walls?
Wall texture is the single most important factor in renter-friendly wall decor success—and it’s the detail nearly every generic apartment decorating guide ignores. You can buy the highest-rated Command strips on Amazon, but if your walls have orange peel texture and scrubbable paint, you’re setting yourself up for failure.
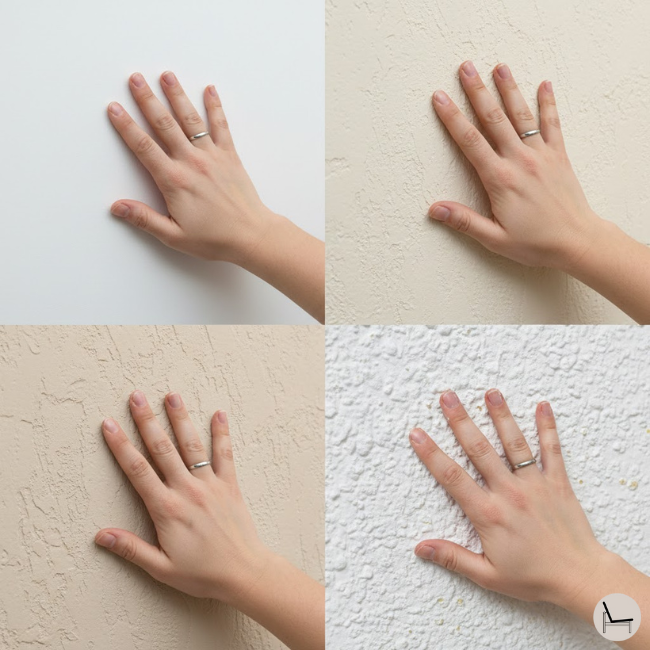
A. The Texture Test You Need to Run
Walk up to your wall and run your hand across it. What you feel determines your entire hanging strategy:
Smooth Drywall feels like printer paper—slightly cool, no bumps. This is the gold standard for adhesive products. If you’re lucky enough to have smooth walls, nearly every renter-friendly wall decor method will work.
Orange Peel Texture feels like a subtle bumpy surface, similar to actual orange skin. This is the most common apartment wall texture. Adhesives work if you use enough strips to compensate for reduced surface contact. Expect to use 1.5x the recommended number of strips.
Knockdown Texture has flattened peaks that look like stomped mud. The irregular surface means adhesives only bond to the raised areas—maybe 60% of the strip’s surface. Removable wallpaper is a nightmare here.
Popcorn Texture is the raised, bumpy ceiling texture sometimes used on walls (especially in older buildings). Standard adhesives fail completely. You need mechanical hanging solutions.
B. The Paint Chemistry Problem
New apartments increasingly use “scrubbable” or “stain-resistant” paints—which contain silicone additives that actively repel adhesives. It’s intentional: these paints shed dirt, which also means they shed sticky products.
The test: Place a Command strip on an inconspicuous area (like inside a closet). Wait 24 hours, then remove it following the stretch-release method. If it pulls off cleanly with no paint damage, your walls are compatible. If the adhesive slides off easily or pulls paint, you have repellent paint and need alternative methods.
C. The Quick Reference Guide
| Wall Type | Best Method | Avoid This | Why It Matters |
| Smooth Drywall | Peel-and-stick / Command Strips | Heavy nails over 20 lbs | Adhesives achieve 95%+ surface contact |
| Orange Peel Texture | Small finishing nails / Multiple strips | Single large adhesive squares | Texture reduces adhesive contact by 30-40% |
| Knockdown Texture | Tension rods / Picture rail systems | Adhesive wallpaper | Only peaks bond; wallpaper bubbles and peels |
| Brick/Cinderblock | Hardwall hangers / Brick clips | Standard tape or Command strips | Porous surface absorbs adhesive; mechanical grip required |
| Glossy/Scrubbable Paint | Light-duty nails / 3M Claw hangers | Standard Command products | Silicone additives prevent adhesive bonding |
According to Jennifer Hunter, professional home stager and founder of Hunter Home Staging: “The number one mistake I see renters make is assuming all walls are the same. In my 15 years staging rentals, I’ve learned that testing your specific wall surface with your specific product is non-negotiable. What works in one apartment fails catastrophically in another—even within the same building.”
💡 Pro Tip: Buy one Command strip and test it in a hidden spot before purchasing an entire gallery wall setup. The $3 test strip could save you $300 in paint repairs.
You’ll Also Like: How To Style Coffee Table Books That Transforms Your Space
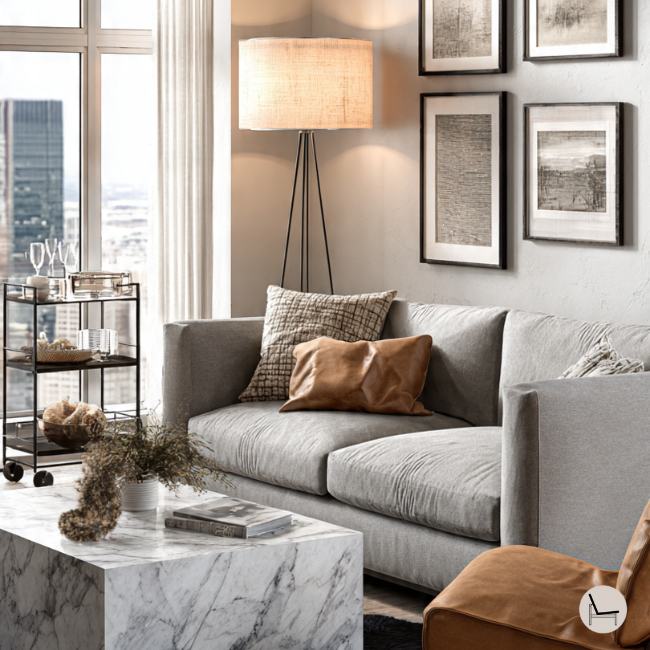
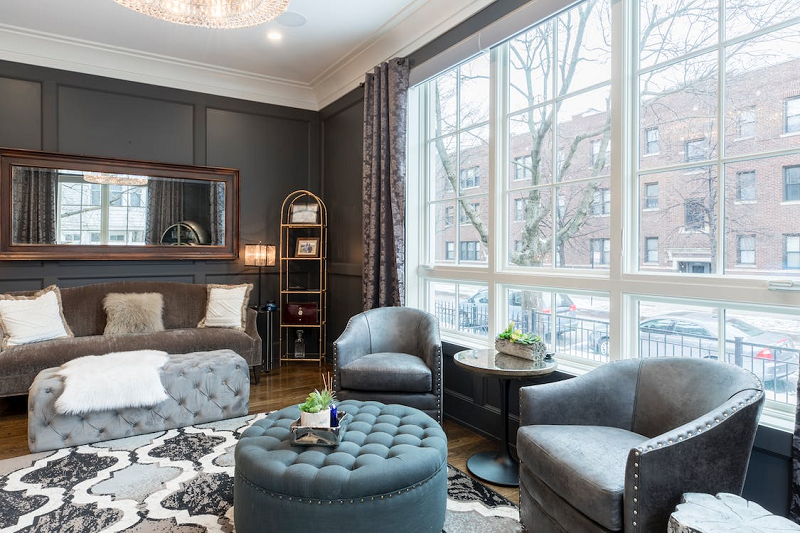
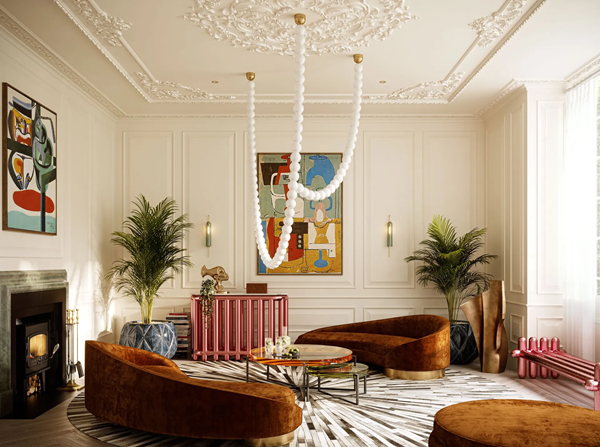
III. Shop the Look: Renter-Friendly Living Room Inspiration
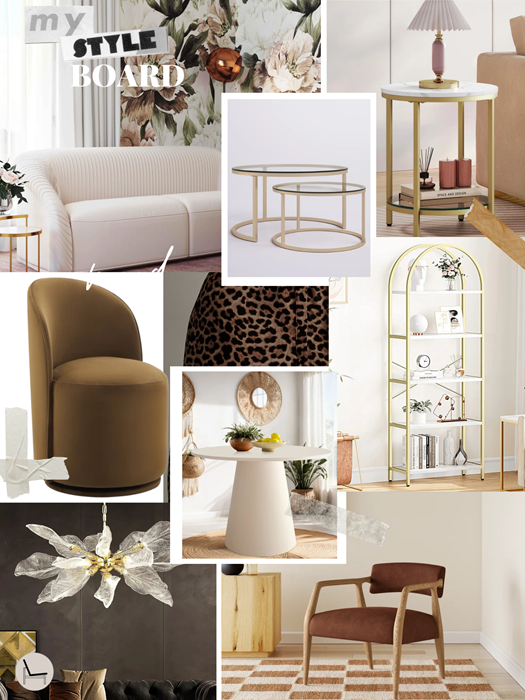
Shop the Look

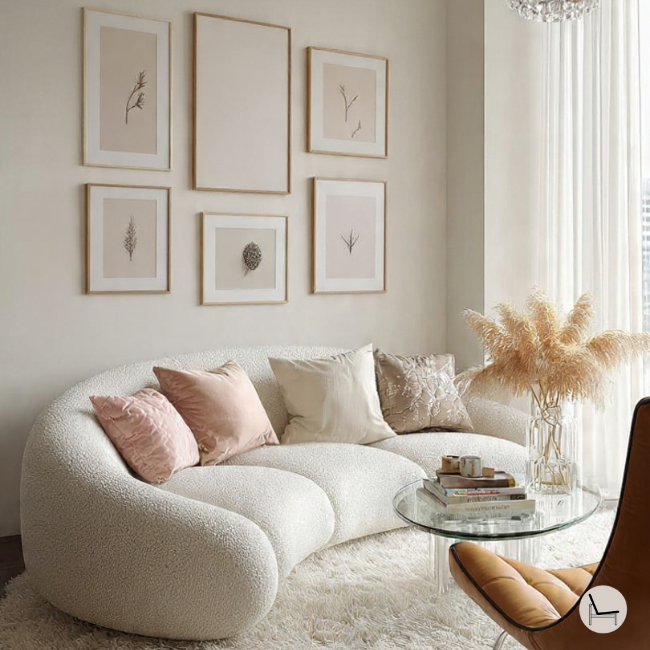
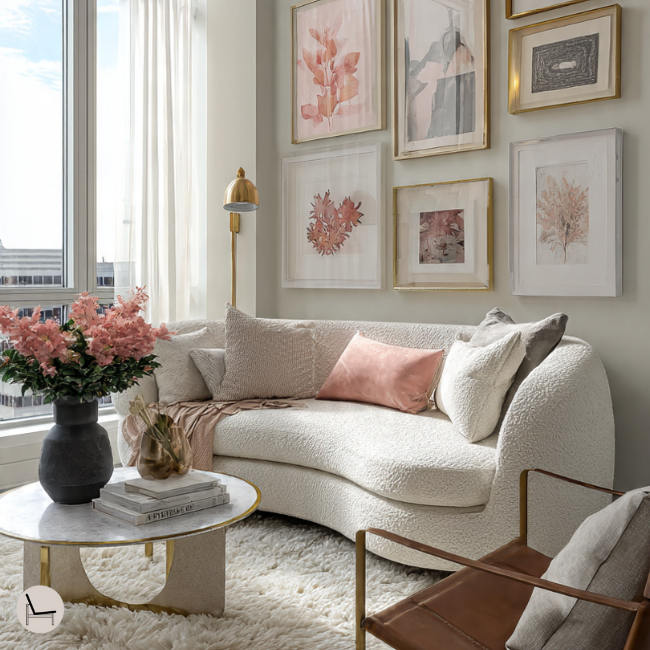
Yara Pleated Beige Velvet Sofa
ShopA soft pleated velvet sofa that adds elegance and comfort to any living room.

Berthe Upholstered Armchair
ShopA cozy cotton armchair with a clean silhouette perfect for modern or transitional spaces.
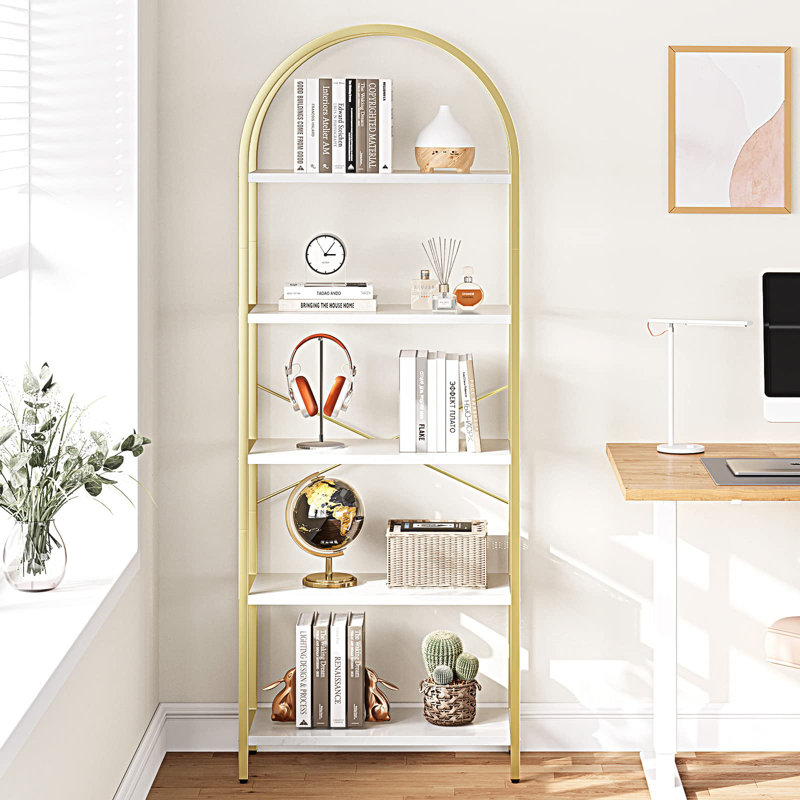
Biana Aluminum Geometric Bookcase
ShopA striking geometric bookcase with a modern metallic frame for bold styling.

Agne 35″ Round Pedestal Dining Table
ShopA compact pedestal dining table ideal for small dining rooms or breakfast nooks.

Sharlene Upholstered Side Chair
ShopA comfortable and stylish dining chair with a timeless upholstered design.

18-Light Modern Dimmable LED Chandelier
ShopA dramatic modern chandelier perfect for dining rooms or grand entryways.
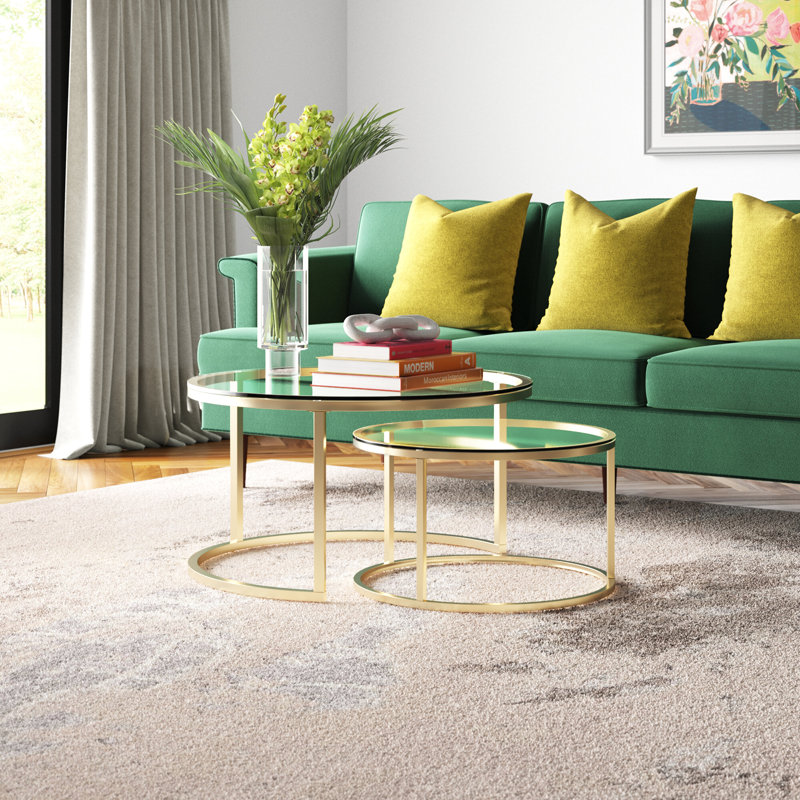
Emmitt Frame 2-Piece Nesting Tables
ShopA sleek set of nesting tables with a glass top and gold frame for modern glam spaces.


57″ Carved 4-Door Sideboard
ShopA beautifully carved sideboard offering generous storage and a modern boho look.

Drennon 7‑Piece Gallery Wall Frame Set
ShopA versatile 7‑piece gallery wall frame set with glass fronts for hanging or tabletop display.
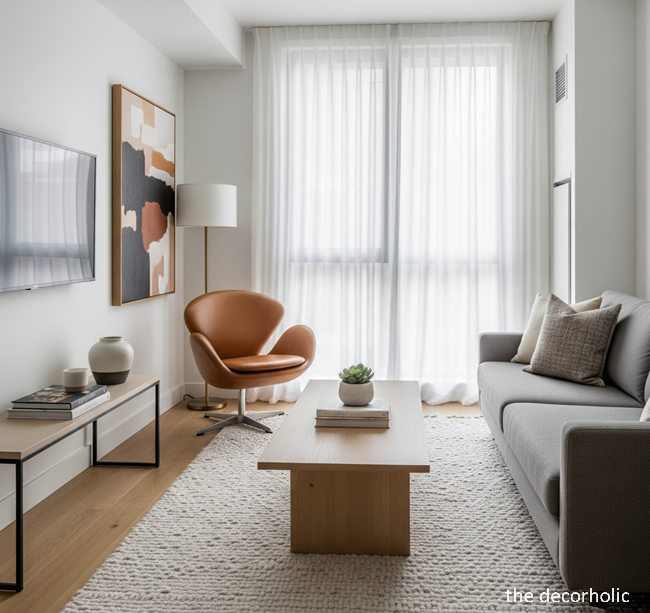
The secret to elevated apartment wall decor without damage isn’t expensive art—it’s understanding the relationship between weight distribution and visual impact. Professional designers working with rental properties know this formula: maximum scale, minimum weight, zero permanent installation.
Your living room is the highest-stakes room for renter-friendly wall decor. It’s where you entertain, where first impressions happen, and where large blank walls scream “temporary tenant” if left bare. Let’s fix that.
[IMAGE SUGGESTION: Aspirational modern living room with large-scale canvas art on Command strips, floating shelves displaying plants and books, and a geometric peel-and-stick accent wall behind the sofa. Include subtle labels pointing to damage-free methods. ALT TEXT: Renter-friendly living room wall decor featuring removable wallpaper and damage-free hanging systems]
A. Lightweight Large-Scale Art (The “Big Wall” Fix)

Abstract Minimalist Wall Art Canvas
A modern abstract canvas perfect for living rooms, bedrooms, or apartments. Neutral tones and soft shapes make it an easy match for minimalist or contemporary décor.
Check Price on AmazonHere’s the design principle that changes everything: One large statement piece creates more visual impact than a gallery wall—and requires fewer hanging points that could damage your walls.
Canvas prints and foam-core mounted art are engineered for renters. A 30″ x 40″ canvas typically weighs under 3 pounds despite its commanding presence. Compare that to a framed print of the same size (8-12 pounds with glass and wood) and you’ll understand why professional stagers always choose canvas for apartments.
The math works in your favor: fewer Command strips needed, less wall stress, easier removal. A single large-scale piece above your sofa anchors the entire room while requiring just 4-6 medium strips—well within the safe zone for most wall types.
What to look for:
- Canvas gallery wraps that extend around the frame edges (no additional framing weight)
- Foam-core mounted photography for ultra-lightweight modern aesthetics
- Fabric tapestries that weigh ounces but deliver massive visual presence
Avoid:
- Heavy wooden frames with glass (weight multiplier)
- Metal prints (beautiful but often 10+ pounds)
- Anything requiring wire hanging (uneven weight distribution stresses adhesives)
💡 Pro Tip: Use the “hand test” when shopping online. If product specs list weight over 5 pounds for wall art, you’re entering territory that requires nails or professional hangers—defeating the damage-free purpose.
B. Damage-Free Shelving & Ledges

Neutral Modern Wall Art Canvas
A warm, neutral-toned abstract canvas that adds texture and depth to any room. Ideal for cozy, modern, or Scandinavian-inspired spaces.
Check Price on AmazonThe revolution in renter-friendly wall decor is the new generation of adhesive shelf systems that use interlocking strips instead of single-point failure hooks. This isn’t your parents’ sticky shelf that crashed down at midnight.
Modern no-drill floating shelves distribute weight across 12-16 inches of industrial-strength strips, rated for 15-20 pounds when properly installed. The secret is the interlocking design: multiple adhesive points work together, so if one section begins to release, the others compensate.
Installation that actually works:
The professional method requires precision. Mark your level line, then apply strips to the shelf first, not the wall. This lets you control exact placement. Press each strip firmly for 30 seconds, creating full contact. Wait that critical one-hour cure time. Then position the entire shelf assembly against the wall, press firmly across all strips for 30 seconds, and step away.
Smart shelf styling for renters:
- Keep weighted items (books, ceramics) toward the wall, not the edge
- Use vertical stacking rather than spreading weight horizontally across the shelf
- Leave the first and last 2 inches of shelf space empty to avoid leverage stress on end strips
Recommended products:
- Umbra Conceal Floating Shelves (the book-spine design handles 15 lbs with proper strip installation)
- Clear acrylic ledges for lightweight decor like candles and small plants
- Adhesive spice racks repurposed as mini plant shelves (under $15 and rated for surprising weight)
C. Removable Wall Treatments (Wallpaper & Decals)

JiffDiff Textured Peel & Stick Wallpaper
A removable, waterproof peel-and-stick wallpaper with a subtle stone texture. Great for accent walls, rentals, or quick DIY makeovers.
Check Price on AmazonThe biggest mistake renters make with peel-and-stick wallpaper is assuming they need to cover an entire wall—when strategic accent panels create the same designer impact for 1/4 of the cost and removal time.
Full-wall wallpaper installation in a rental is a gamble. You’re betting on perfect adhesion to unknown paint, smooth removal in 1-2 years, and that your landlord’s “freshly painted” claim from 5 years ago is actually true. The professional move? Think in panels, not rooms.
The accent panel strategy: Choose one focal wall or even a 4-foot-wide vertical strip behind your bed or dining area. This concentrated dose of pattern delivers the “designed space” feeling without the commitment and expense of 100+ square feet of material.
Application intelligence:
- Always start with a test panel in your closet to verify removal on your specific wall
- Apply when room temperature is 68-72°F (adhesive is temperature-sensitive)
- Use a squeegee or credit card to work out bubbles from center outward
- For textured walls, accept that this method may not work—adhesive can’t grip irregular surfaces
Design choices that work:
- Geometric patterns in neutral tones (easier to match seams if you need to replace a panel)
- Vertical stripe murals that draw the eye up, making rooms feel larger
- Subtle botanical prints for accent walls in bedrooms and dining areas
Wall decals as the gateway option: If wallpaper feels too permanent, large-scale vinyl decals offer the same visual punch with easier removal. Modern geometric shapes, abstract line art, and oversized botanicals can transform a wall in 20 minutes.
💡 Pro Tip: Buy 10% more wallpaper than calculated. If removal damages a section, you can patch it perfectly before your move-out inspection. This $15 insurance policy has saved countless security deposits.
In Case You Missed It: 23 Living Room Corner Ideas That Transform Wasted Space Into Stunning Design Features
IV. Small Space Strategy: Decor That Adds “Depth”
In apartments under 800 square feet, renter-friendly wall decor must do double duty—it can’t just look good, it must actively make your space feel larger. This is where most small-space advice fails: it tells you to “keep it minimal” when what you actually need is strategic maximalism that manipulates perception.
A. The Verticality Principle
Your eyes naturally follow vertical lines upward. Exploit this. A 6-foot leaning floor mirror against the wall requires zero installation but draws sight lines from floor to ceiling, effectively doubling your perceived wall height. This is why high-end studio apartments always feature tall, narrow elements.
The leaning mirror formula:
- Minimum 60 inches tall to create the upward pull
- Lean at 80-85 degree angle (nearly vertical) secured with museum putty at the base
- Position in corners to “lift” the entire room without taking up floor space
No Command strips needed. No wall damage risk. Just instant architectural presence.
B. Reflection as Expansion
Acrylic mirrors are the renter’s secret weapon—they weigh 50% less than glass but reflect just as much light. Strategic mirror placement opposite windows creates the illusion of additional windows, effectively stealing natural light and doubling it back into your space.
The professional staging trick: Use multiple small mirrors (12″ x 12″) in a grid pattern rather than one large mirror. This distributes weight across more Command strips while creating a modern, intentional design statement. Each small mirror might weigh 1-2 pounds—well within easy damage-free hanging territory.
Where to place reflective surfaces:
- Directly opposite your primary window to bounce maximum light
- On walls perpendicular to windows to spread light sideways across the room
- Above low furniture to create visual “height” where you need it
C. The Low-Profile Rule
In narrow hallways and small entryways, anything protruding more than 2 inches becomes a shoulder-bumping hazard. This is where thickness matters more than size.
Choose:
- Canvas prints (0.75″ depth) over framed art (2-4″ with frame)
- Flat wall decals over 3D sculptural pieces
- Shallow floating shelves (6″ depth maximum) over deep bookshelves
According to Sarah Richardson, interior designer featured in Design*Sponge: “The biggest mistake in small apartments is selecting decor based on what you want rather than what the space can physically handle. A beautiful piece that you constantly bump into creates stress, not style. In tight spaces, I always specify ultra-thin solutions.”
💡 Pro Tip: Use the “arm extension test.” Stand in your hallway with your arm extended at shoulder height. If your fingertips touch the opposite wall, anything protruding more than 1.5 inches will be in your traffic flow. Choose accordingly.
You’ll Also Like: Essential Apartment Must-Haves: A Guide to First-Time Decorating
V. Budget Breakdown: The Save vs. Splurge Guide
The counterintuitive truth about renter-friendly wall decor: cheap peel-and-stick wallpaper costs you more in the long run because it damages walls during removal, while premium versions peel off cleanly. Let’s talk about where your money actually matters.
A. Where to Splurge (And Why)
High-Quality Peel-and-Stick Wallpaper ($40-60 per roll)
Premium wallpaper from brands like Tempaper, RoomMates, or Chasing Paper uses repositionable adhesive that’s engineered for clean removal. The cheaper Amazon alternatives ($15-25/roll) often use aggressive adhesive that bonds permanently over time—defeating the entire “temporary” promise.
The chemistry difference: Quality wallpaper uses a pressure-sensitive adhesive that maintains its removal properties for 2-3 years. Budget versions use cost-saving formulations that cure harder over time, essentially becoming permanent wallpaper that will tear your paint when removed.
The ROI: Spend $150 on good wallpaper now or risk a $300+ paint repair charge at move-out. The math is simple.
Professional-Grade Command Strips
Yes, there are knockoff “damage-free hanging strips” for half the price. And yes, they fail at twice the rate. 3M’s Command strips have 15+ years of formulation refinement. The adhesive strength, the stretch-release tab design, and the clean removal chemistry are patented for a reason.
Investment: $25-40 for a gallery wall kit vs. $200 drywall repair.
B. Where to Save (Smart Substitutions)
DIY Frame Gallery from Thrifted Frames
Instead of buying $40-80 framed prints, hit thrift stores for $3-8 vintage frames. Replace the dated art with your own prints (Shutterfly, Printique, or even high-quality home printing). A 9-piece gallery wall costs under $60 vs. $400+ retail.
The key: Choose lightweight frames (plastic or thin wood) and remove the glass entirely. Use the mat board and backing only. This drops weight by 60%, letting you use fewer Command strips per frame.
Large-Scale DIY Art
A 36″ x 48″ canvas from Michael’s runs $25-40. Add a $15 can of paint and painter’s tape for geometric designs. Total investment: $40-55 for art that would cost $200-400 retail. Your landlord doesn’t know you didn’t pay designer prices.
Fabric as Wallpaper Alternative
Buy 2-3 yards of statement fabric ($15-30) and attach it to foam-core boards with spray adhesive. Hang the boards with Command strips. You get the visual impact of wallpaper with zero adhesive touching your walls. Removal is literally pulling down lightweight boards.
C. The Essential Renter’s Toolkit
Don’t overbuy. These 4 items handle 90% of damage-free hanging scenarios:
- Torpedo Level ($8-12): Non-negotiable for straight hanging
- Isopropyl Alcohol & Microfiber Cloths ($6): Surface prep that actually works
- Hairdryer ($15-20): Essential for safe adhesive removal
- Needle-Nose Pliers ($8): For pulling finishing nails if you go that route
Total investment: $40-50 for a toolkit that lasts your entire renting career.
💡 Pro Tip: Buy Command strips in bulk during Amazon Prime Day or Black Friday. The price per strip drops 40-50%, and they never expire if stored in a cool, dry place.
You’ll Also Like: Studio Apartment Decorating Expert Tips: Maximize Your Space and Style
VI. The “Move-Out” Protocol: Safe Removal Guide
Proper removal is more important than proper installation—this is where renters either get their full deposit back or lose hundreds to “damage fees.” Everything you’ve hung can come down safely if you follow the correct chemistry and physics. Rush it, and you’ll be watching paint peel off in sheets.
Step 1: The Heat Method (For Wallpaper and Stubborn Adhesives)
Set your hairdryer to medium heat and hold it 6 inches from the wall surface. Move it slowly across the adhesive or wallpaper for 30-45 seconds. You’re softening the adhesive’s molecular bonds, not melting them. The material should feel warm to the touch but not hot.
For peel-and-stick wallpaper, start at a top corner and pull down at a 45-degree angle slowly. The key word is slowly—6 inches per minute. Your goal is to let the adhesive release gradually. Yank it, and the adhesive stays behind (or worse, takes paint with it).
Temperature matters: Ideal room temperature is 70-75°F. Too cold and adhesive becomes brittle and fractures, leaving residue. Too hot and it becomes too liquid, spreading into paint pores.
Step 2: The Dental Floss Trick (For Foam Mounting Tape)
This is the professional secret for removing Command strips’ foam mounting squares without touching the stretch tab. Take an 18-inch length of unflavored dental floss (waxed works better). Work the floss behind the foam strip and use a gentle sawing motion, keeping the floss parallel to the wall surface.
The physics: you’re creating a separation plane between the adhesive and the paint. The thin floss cuts through the foam without applying the perpendicular pressure that tears paint.
Critical technique points:
- Keep even tension on both ends of the floss
- Saw horizontally—never pull outward from the wall
- Work slowly; rushing creates heat buildup that re-softens adhesive
- If you hit resistance, stop and apply heat with a hairdryer for 20 seconds
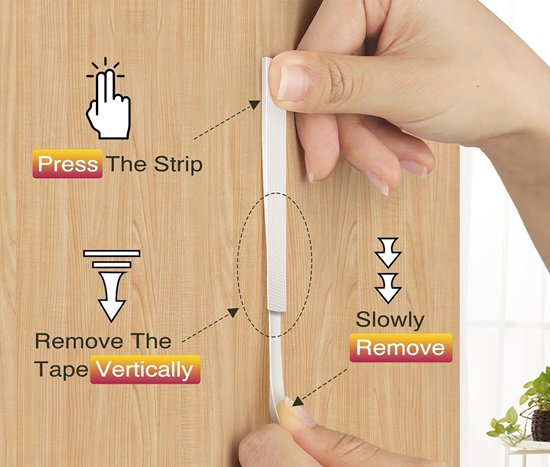
For Command strips with pull tabs: pull the tab down (toward the floor) slowly and steadily, not outward. The stretch-release design requires at least 15 seconds of steady pulling. Yanking it defeats the engineered release mechanism.
Step 3: The “Ghosting” Fix (Adhesive Residue Cleanup)
Even with perfect removal, you might see adhesive residue or “ghosting” where strips were. Here’s the fix that doesn’t damage paint:
Apply a small amount of Goo Gone or rubbing alcohol to a microfiber cloth (never directly on the wall). Gently rub in circular motions. The solvent breaks down adhesive polymers without affecting latex paint—assuming you use it sparingly.
For stubborn residue: Make a paste of baking soda and water (3:1 ratio). Apply with a soft cloth and let sit for 2-3 minutes. The mild abrasive lifts residue without scratching paint. Wipe clean with a damp cloth, then dry immediately.
The nuclear option if adhesive won’t budge: Very lightly dampen a Magic Eraser and use minimal pressure. These are micro-abrasive and WILL dull paint sheen if you press hard or scrub. This is a last resort before you’d need to repaint anyway.
💡 Pro Tip: Schedule your removal for a warm afternoon. Adhesives release 300% easier at 75°F than at 60°F. This single timing choice can be the difference between clean walls and paint damage.
In Case You Missed It: 10 Must-Have Furniture Essentials You Must Own For Your Home

VII. Style Guide: Masculine vs. Minimalist vs. Maximalist
The same damage-free hanging methods work for every aesthetic—it’s the product choices and arrangements that change. Here’s how to adapt renter-friendly wall decor to your specific style without compromising your security deposit.
A. Masculine Apartment Decor (The Industrial-Refined Approach)
Masculine spaces lean toward raw materials, darker tones, and substantial-looking pieces—which seems incompatible with lightweight renter-friendly solutions. The trick is visual weight, not actual weight.
The strategy:
- Large-scale black and white photography on canvas (weighty appearance, light reality)
- Metal grid systems for organizing/displaying without drilling (they lean against walls)
- Dark peel-and-stick geometric wallpaper behind a home bar or desk area
- Leather and wood accents on floating shelves instead of traditional wall-mount shelves
Color palette: Charcoal, navy, black, warm cognac browns, brushed metals.
Product focus:
- Oversized blueprint-style city maps (engineering aesthetic, foam-core light)
- Industrial-look wire baskets on Command hooks
- Removable subway tile backsplash for kitchen accent walls
B. Minimalist (The “Less But Better” Philosophy)
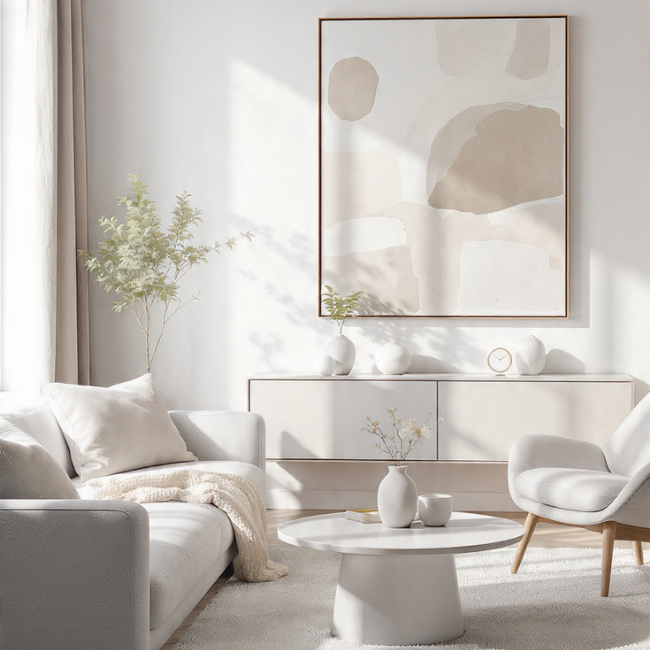
Minimalist doesn’t mean empty walls—it means intentional, high-impact pieces with maximum negative space. This actually works perfectly for renter-friendly wall decor because you’re using fewer items, meaning fewer potential damage points.
The strategy:
- One large abstract canvas (36″ x 48″) as the only art in a room
- Single floating shelf styled with 3-5 carefully chosen objects
- Monochromatic palette that blends walls and decor for seamless flow
Color palette: Whites, soft grays, black accents, natural wood tones.
The minimalist advantage: You might use only 8-10 Command strips in an entire apartment. Less product = less cost = less removal work = less risk.
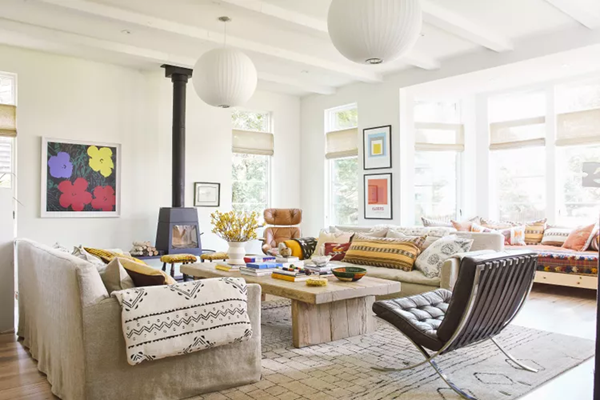
C. Maximalist & Boho Rental Ideas (Curated Abundance)
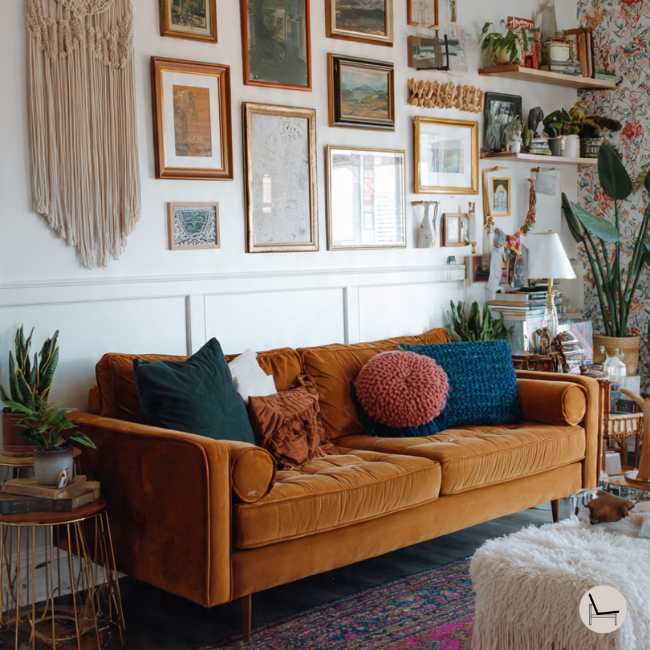
Maximalism in a rental is about layering texture and pattern without creating visual chaos that screams “temporary.” The key is repetition and intention—lots of elements that clearly belong together.
The strategy:
- Gallery wall with 20+ pieces in mismatched vintage frames (thrifted and lightweight)
- Layered removable wallpaper (subtle pattern on 3 walls, bold accent on 1)
- Macramé wall hangings on tension rods or adhesive hooks
- Floating shelves densely styled with plants, books, and collected objects
Color palette: Jewel tones (emerald, sapphire, ruby) mixed with terracotta, mustard, and blush.
The boho-specific approach:
- Use tension rods between walls to hang tapestries (zero wall damage)
- Cluster lightweight rattan mirrors in asymmetric arrangements
- Peel-and-stick Moroccan tile patterns in kitchens and bathrooms
💡 Pro Tip: In maximalist spaces, embrace imperfection in hanging. Slightly uneven gallery walls feel intentional and collected-over-time, not “just moved in.” This also gives you permission to adjust and move things without obsessing over nail holes.
You’ll Also Like: How to Arrange Pillows on a Couch Like a Pro: The Foolproof Step-by-Step Guide
Most Popular Post:
Interior Design Style Quiz
Timeless Paint Colors That Never Go Out of Style
Create Your Perfect Ergonomic Home Office: A Complete Guide
Must-Have Accessories for Guys: The Secret to a Stylish Space
Modular Sofas for Small Spaces: Brilliant Solutions for Compact Living
Conclusion & Next Steps—Your Deposit-Safe Transformation Starts Now
You’re no longer the renter staring at blank walls, paralyzed by security deposit anxiety. You have the technical knowledge property managers wish you didn’t: wall texture compatibility, adhesive chemistry, removal protocols that actually work.
Here’s what happens if you don’t act: Those beige walls continue screaming “temporary.” Your apartment never feels like yours. And the irony? You’re still at risk of deposit deductions from normal wear and tear because you haven’t documented the walls’ original condition.
Here’s what happens when you use this guide: You implement renter-friendly wall decor with confidence. You create a space that’s unmistakably personal and styled. And when you move out, you execute the safe removal protocol, take your decor with you, and get your full deposit back to fund your next place.
Your next 48-hour action plan:
- Document your walls right now: Take photos of every wall in your apartment from multiple angles. Note any existing scuffs, nail holes, or imperfections. This is your insurance policy.
- Run the texture and paint test: Use the methods in the Compatibility section to determine your exact wall type. This 10-minute assessment determines your entire strategy.
- Start with one high-impact area: Don’t overwhelm yourself by trying to decorate an entire apartment at once. Choose your most-used wall (above the sofa, behind the bed, in the entryway) and make it perfect using these damage-free methods.
The security deposit you save isn’t just money—it’s freedom. Freedom to move when you want. Freedom to know you’ve mastered rental living without compromise.
Your walls are waiting. Make them yours.
Disclaimer: This post may contain affiliate links. I earn a commission on qualifying purchases at no additional cost to you.
H2: FAQ: Answering Your Security Deposit Questions
Q: Does peel-and-stick wallpaper really come off clean, or is that marketing?
A: It depends entirely on three factors: wallpaper quality, your wall’s paint type, and how long it’s been up. Premium brands (Tempaper, Chasing Paper, Graham & Brown) use removable adhesive specifically engineered to peel off cleanly for 2-3 years. Budget options often use semi-permanent adhesive that cures harder over time.
Your wall matters more than the wallpaper. Flat or eggshell paint releases wallpaper easily. Scrubbable or high-gloss paint can bond too well with the adhesive, making removal tricky. And here’s the variable no one mentions: wallpaper up for 6 months removes easier than wallpaper up for 18 months as adhesive bonds strengthen.
The reality check: Test a small section in a closet first. If it peels cleanly after a week, you’re likely safe. If it resists or leaves residue, you know before you commit to an entire wall.
Q: How much weight can a Command hook actually hold?
A: Command’s ratings are conservative—but only if you follow installation rules perfectly. A strip rated for 5 pounds can often hold 7-8 pounds in ideal conditions (smooth wall, proper cure time, no humidity). But in poor conditions (textured wall, rushed install, bathroom moisture), that same strip might fail at 3 pounds.
The professional formula: Use Command strips rated for 2x your actual item’s weight. Hanging a 4-pound frame? Use strips rated for 8-10 pounds total. This accounts for wall texture, paint variability, and long-term adhesive creep.
Critical detail: Weight ratings assume vertical hanging. Anything creating outward pull (a heavy shelf with items toward the front edge) multiplies stress exponentially. A 5-pound-rated strip might only safely hold 2-3 pounds if the weight is 6 inches out from the wall.
Q: What do I do if I accidentally rip the paint off?
A: You have two options: strategic concealment or DIY repair—and both can work if you act immediately.
Option 1: The Concealment Strategy If the damage is small (under 1 inch) and in a non-obvious location, leave the Command strip backing in place to cover it. Seriously. That white square might be less noticeable than exposed drywall. Take photos for your move-out documentation showing the damage existed and was caused by an “approved damage-free method.”
Option 2: The Quick-Fix Repair For larger tears, here’s the 20-minute patch:
- Remove loose paint: Use your finger to gently press around the damaged area and peel away any paint that’s lifting but hasn’t detached yet. You want a clean, stable edge.
- Spackle the crater: Use lightweight spackle (not joint compound) to fill any exposed drywall. Apply with a putty knife, overfilling slightly. Let dry 1-2 hours.
- Sand smooth: Use 220-grit sandpaper in light circular motions until the patch is flush with surrounding paint. Wipe away dust with a damp cloth.
- Touch-up paint: This is the tricky part—you need to match your wall color. If you’re lucky, your landlord used a standard color (many apartments use Sherwin Williams “Accessible Beige” or “Agreeable Gray”). Buy a sample pot ($4-6) and apply with a small foam brush, feathering edges. Multiple thin coats beat one thick coat.
The honest assessment: DIY repairs work for minor damage but rarely match perfectly. If the tear is larger than a quarter or in a highly visible area, you might be better off disclosing it to your landlord at move-out and negotiating a $20-50 repair charge rather than attempting an amateur fix that looks worse.
💡 Pro Tip: Before moving in, ask your landlord or property manager for the exact paint color name and finish used in your unit. This $0 conversation can save you hundreds in matching struggles later.
Subscribe To the Newsletter!
Subscribe now for an endless feed of inspirational women’s cave decor ideas, pampering rituals, and more tips for curating your ultimate escape. Let’s start making your cozy refuge a reality – you so deserve this!
CATCH THE LATEST IN HOME DECOR TRENDS:
Steal These 16 Expert-Approved Decorating Secrets

How To Accessorize Your Living Room
Small Space? 10 Ways To Make A Room Appear Bigger
Make Your space Look Expensive
GET CAUGHT UP ON ALL THE INSPIRING DECOR TIPS:
18 Fresh Decorating Ideas To Update Your Fireplace
How to Make a Gallery Wall: The Complete Step-by-Step Guide (Even If You’ve Never Hung a Picture)


